DynamoDB is a serverless NoSQL database that is managed completely by AWS. Such a service obviates the need for application developers to manage and maintain a backend database server of their own.
Recall our Guestbook application and its MVP architecture. By defining an abstract base class for the backend Model, our implementation allows us to replace one model implementation with another without changing our application code. To begin with, in your local system or VM checkout the course repository and change into the code directory.
git clone https://github.com/bfritscher/guestbook-src.git
cd guestbook-src/05_aws_dynamodb
In examining the code, notice that it is largely the same as our prior code with a handful of differences. The first is that the name of the script is now app.py to follow the naming convention of some of the AWS services such as Elastic Beanstalk. The second is that the initializer for the gbmodel class (__init__.py) now supports a new model backend to support DynamoDB.
gbmodel/__init__.py
# __init__.py

model_backend = 'dynamodb'

if model_backend == 'pylist':
    from .model_pylist import ModelPylist as model
elif model_backend == 'dynamodb':
    from .model_dynamodb import ModelDynamoDB as model
Finally, the code implementing the DynamoDB backend database model has been added (model_dynamodb.py).
Our code for model_dynamodb creates a DynamoDB table if one does not exist and implements our select and insert. When gbmodel is instantiated, the code sets up a DynamoDB resource and a DynamoDB table named guestbook. If the guestbook table already exists, the call to load() the table will succeed. If not, a new table is created.
When creating the new table, the KeySchema defines a primary key and a range key for the table using email and date. The AttributeDefinitions define email and date as attributes with the type string. Lastly, we set the minimum ProvisionedThroughput which will be plenty for the purposes of this lab.
gbmodel/model_dynamodb.py
from datetime import datetime
import boto3

class model(Model):
    def __init__(self):
        self.resource = boto3.resource("dynamodb")
        self.table = self.resource.Table('guestbook')
        try:
            self.table.load()
        except:
            self.resource.create_table(
                TableName="guestbook",
                KeySchema=[
                    {
                        "AttributeName": "email",
                        "KeyType": "HASH"
                    },
                    {
                        "AttributeName": "date",
                        "KeyType": "RANGE"
                    }
                ],
                AttributeDefinitions=[
                    {
                        "AttributeName": "email",
                        "AttributeType": "S"
                    },
                    {
                        "AttributeName": "date",
                        "AttributeType": "S"
                    }
                ],
                ProvisionedThroughput={
                    "ReadCapacityUnits": 1,
                    "WriteCapacityUnits": 1
                }
            )
The select method is implemented by calling scan() on the table. This returns all of the guestbook entries.
gbmodel/model_dynamodb.py
    def select(self):
        try:
            gbentries = self.table.scan()
        except Exception as e:
            return([['scan failed', '.', '.', '.']])

        return([ [f['name'], f['email'], f['date'], f['message']] for f in gbentries['Items']])
The insert method prepares the item as a Dict and then calls put_item to add the item to the table.
gbmodel/model_dynamodb.py
def insert(self,name,email,message):
gbitem = {
'name' : name,
'email' : email,
'date' : str(datetime.today()),
'message' : message
}
try:
self.table.put_item(Item=gbitem)
except:
return False
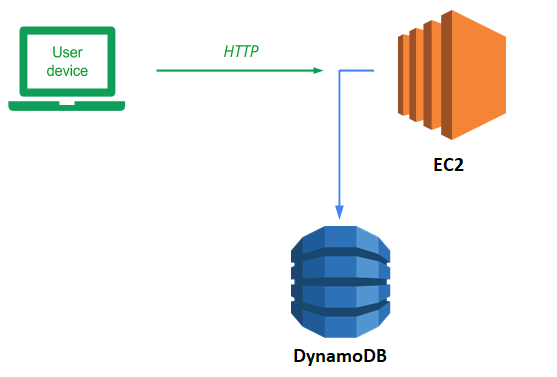
return TrueHybrid cloud deployments will have some infrastructure running on-premise and some hosted in the cloud provider. In this version, we'll start with running the web application on your local computer or VM and connect it up to the DynamoDB model backend that is hosted on your AWS account. Visit the source directory of the application.
cd guestbook-src/05_aws_dynamodb
View the requirements.txt file. The main packages we need will be flask and AWS's Python package for accessing all of its services: boto3. The gunicorn package is also to support a subsequent version that runs within a Docker container.
requirements.txt
# Web framework
flask

# AWS libraries
boto3

# Python WSGI HTTP server (connects web servers such as nginx to app)
gunicorn
Set up the virtual environment and install the requirements:
python3 -m venv env
./env/Scripts/Activate.ps1
pip install -r requirements.txt
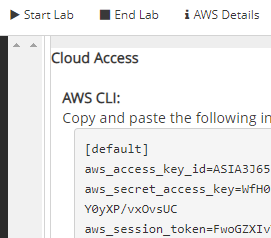
boto3 requires a valid set of AWS credentials in order to authenticate properly to the backend DynamoDB instance of your AWS account. Unfortunately, our classroom environment will not allow us to create credentials of our own that have least privileges. We will instead use the full credentials of the account we are given. Account credentials can be obtained via the Vocareum "AWS Details" UI as described at the beginning of the course in the AWS Academy setup. Then, next to the "AWS CLI", click on the "Show" button to reveal the account's key information.
In your user home directory C:\Users\[username] create or edit the directory and file .aws/credentials and past the content from the webpage.
After configuring your credentials and region, run the application:
python app.py
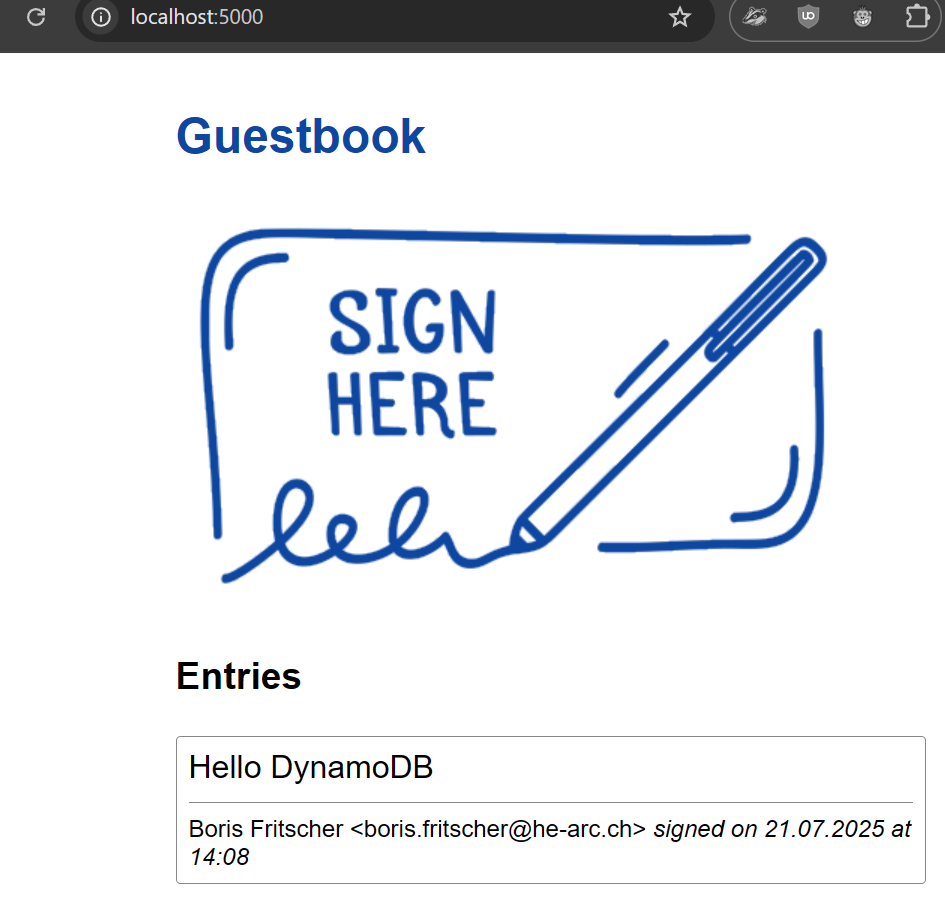
The application comes up on Flask's default port. Click on the URL given to launch a browser to load the application or visit http://localhost:5000 to view the application running. Sign the guestbook with your name and PSU e-mail address with the message "Hello DynamoDB"
Type "Ctrl+c" to exit the application.
Then, bring up the AWS Console and navigate to the DynamoDB service. Click on "Tables" in the left navigation pane to list the tables that have been created, and then click on the "guestbook" table that has just been created by the Python application.
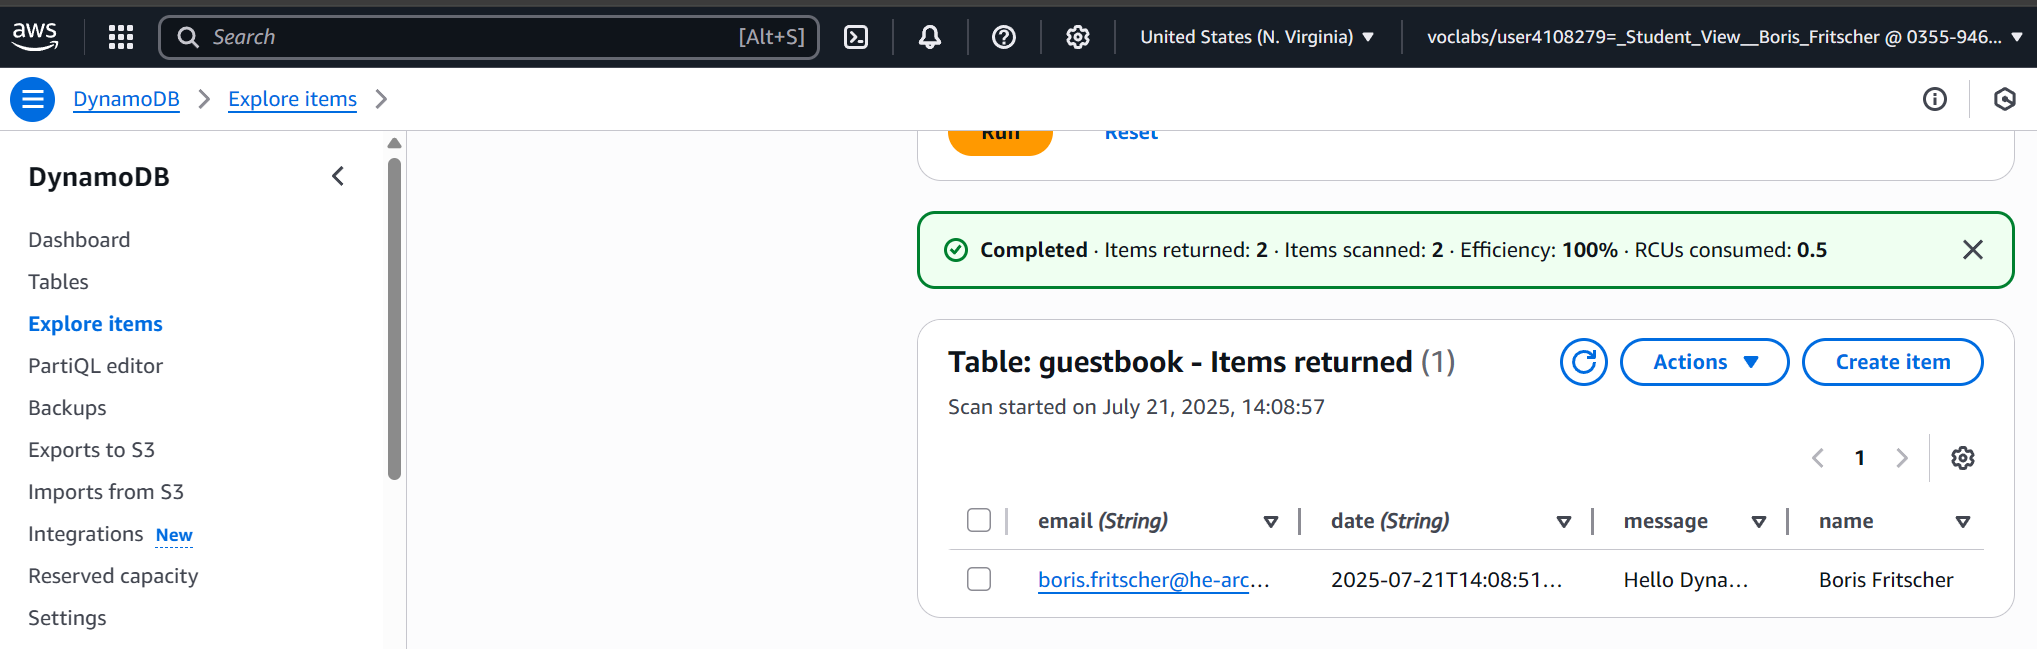
Click on the "Explore table items" tab and view the entry you have just added to your DynamoDB table. Go back to your terminal and type "Ctrl+c" to exit out of the application.
Locally running our code is great if we're the only ones who need to run it and if the number of users we have is limited. Eventually, when this application takes over the world, we will want to run it everywhere and have the ability to scale it up to run on hundreds of servers. Containers help us address both of these issues. They package up our application's environment so that it can be shipped anywhere and they can be replicated across a multitude of servers as long as any persistent state is stored outside of the container (in this case, our DynamoDB backend).
Examine the Dockerfile we will be using to containerize our application and change the maintainer to yourself. As the file shows, we'll use python:alpine as the base layer and then run our container using gunicorn. Note that the command line parameters used for executing gunicorn include a flag --bind that will either pull the port for gunicorn to listen on from the environment variable PORT passed into the container or else use 80 if the environment variable is not set. In addition the app:app argument specifies that gunicorn will go to app.py and launch the app object within it to start the server.
Dockerfile
# Use a small Python-based distribution for base layer
FROM python:alpine

# Specify your e-mail address as the maintainer of the container image
LABEL maintainer="yourname@pdx.edu"

# Copy the contents of the current directory into the container directory /app
COPY . /app

# Set the working directory of the container to /app
WORKDIR /app

# Install the Python packages specified by requirements.txt into the container
RUN pip install -r requirements.txt

# Set the parameters to the program
CMD exec gunicorn --bind :${PORT:-80} --workers 1 --threads 8 app:app
The contents of the entire directory in which we are building our Docker container is copied via the COPY . /app command. Unfortunately, this directory contains our local Python environment and dynamically compiled Python code from our previous version. We do not want to include these directories in our container image. Much like .gitignore can be used to ignore files in git, a .dockerignore file does the same for docker as shown below:
.dockerignore
env
__pycache__
Build the container with the following command. If you get a permission error, you will need to add your username to the docker group via usermod or run the command using sudo.
docker build -t aws_gb .
We will now run a containerized version of the application. The container requires the AWS environment variables to be set in order to authenticate access to our DynamoDB backend. While we could set them directly when running directly in the shell previously, for our container version, we need to pass them in via the docker command.
We could get around this by copying the credentials into the container image itself, but this is not recommended for security reasons since anyone that is able to access the container image will now be able to access our credentials and tamper with our DynamoDB backend.
Go back to the Vocareum console and view the "AWS Details". Since these particular credentials we're using are ephemeral, we must make sure to pass container credentials that are still valid. Then, using the AWS environment variables listed, run the following docker command on your terminal (substituting your credentials).
The command sets all of the environment variables via the -e flag, including the PORT variable specifying that the container will listen on port 80. The -p flag then maps the machine port 8000 to the container's port 80. Finally, the name of the container built above is specified.
docker run -e AWS_ACCESS_KEY_ID=ASIA...32F -e AWS_SECRET_ACCESS_KEY=p22Z...COe -e AWS_DEFAULT_REGION=us-east-1 -e AWS_SESSION_TOKEN=FwoG...A== -e PORT=80 -p 8000:80 aws_gb
After running this command, you should see the container output showing the server running:

Bring up a browser and visit the application via http://localhost:8000. Sign the guestbook with your name and e-mail address with the message "Hello Docker DynamoDB".
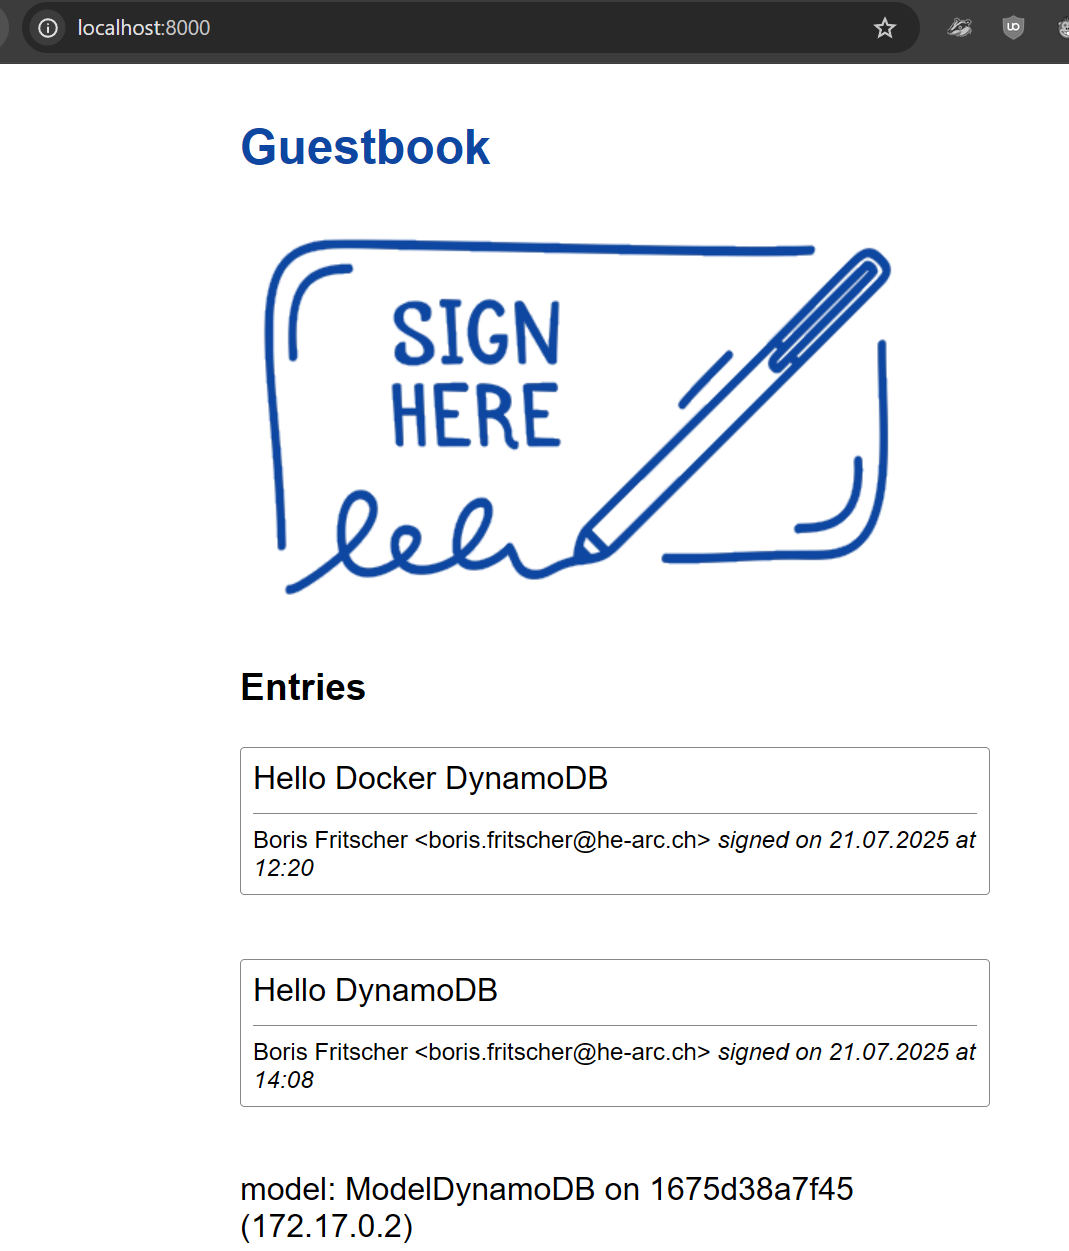
Type "Ctrl+c" to exit the container. Go back to the AWS DynamoDB console and see that a second item has been added to the table.
Examine the container image you've built to see its size.
docker images
Currently, the container image has a local tag aws_gb. We wish to distribute our container image widely so that it can be run anywhere and everywhere. To do so, we'll repeat the steps from before to tag and push our image to GitHub Registry. First, login to your GitHub account with username and token (you generated previously).
docker login ghcr.io -u USERNAME
Then, tag the image with your Docker ID.
docker tag aws_gb ghcr.io/<username>/aws_gb
Finally, push the image to Docker Hub.
docker push ghcr.io/<username>/aws_gb
View the container image on Github and make its visibility public.
https://github.com/users/
Click on Package settings > Change package visibility
In this lab, you will deploy onto an EC2 instance using a pre-defined role with a limited set of permissions. Bring up your AWS Academy lab and launch the AWS console. Then, navigate to EC2. Begin the steps to launch a new instance.

Use the following specifications:
- Name the instance:
guestbook - Image: Ubuntu 64-bit x86 OS
- SSH Key pair: Use your own key pair you set up in the previous lab or create a new one.
- Network settings: create a new security group that allows both SSH and HTTP traffic to the instance
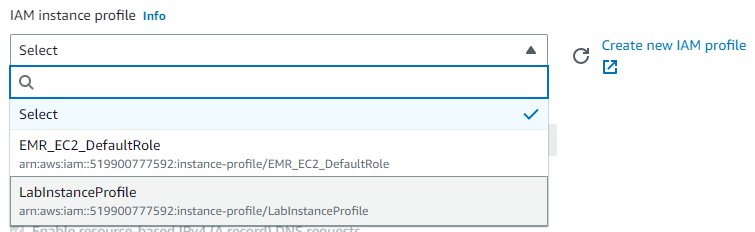
Finally, in the Advanced section of the instance, locate the settings for specifying an IAM instance profile to associate with the VM. The pre-defined role LabInstanceProfile contains permissions to utilize DynamoDB. Select the role.
Click on "Launch Instances" and then on "View Instances" and wait for the VM to get into a "running" state. Click on the instance when it is up and note its public IPv4 address.
Connect to VM
We can connect to our VM using the ssh key we setup. Since this is a Ubuntu-based EC2 instance, the username associated with the key is ubuntu.
ssh ubuntu@<IP_address_of_EC2>
Install docker
Since we've gone through the trouble of publishing our application as a Docker container on GitHub for all the world to run, we can start our web domination by running it on our EC2 instance. To begin with, we'll first install Docker.
sudo apt update -y
sudo apt install docker.io -y
Run the container
Then, we simply run the container using its GitHub identifier. Because docker is a privileged command and we are running on a privileged port 80, we must run the command via sudo.
AWS resources are typically tied to a region. In our case, we must run on us-east-1 as part of our sandbox limitations.
Note that, unlike our prior version, AWS credentials do not have to be supplied since requests to DynamoDB from this EC2 instance will automatically assume the role we defined.
sudo docker run -e AWS_DEFAULT_REGION=us-east-1 -e PORT=80 -p 80:80 ghcr.io/<username>/aws_gb
Visit the site using the instance's IP address via http://<IP_address_of_EC2>
Add a guestbook entry that uses your name and email with a message "Hello EC2!".
View the database
Go back to the table in DynamoDB. Explore the table items to see the entries in the Guestbook.
Task Progress
Take a screenshot showing:
- The guestbook with its ip and entries.
- DynamDB table guestbook with its items
Upload the combined screenshot to complete the lab.

Visit EC2 and terminate the remaining instance.
