In this lab, we will automate the entire lifecycle of a cloud-native application. We will move beyond single-VM deployments to a more robust, orchestrated environment using Kubernetes.
We will use:
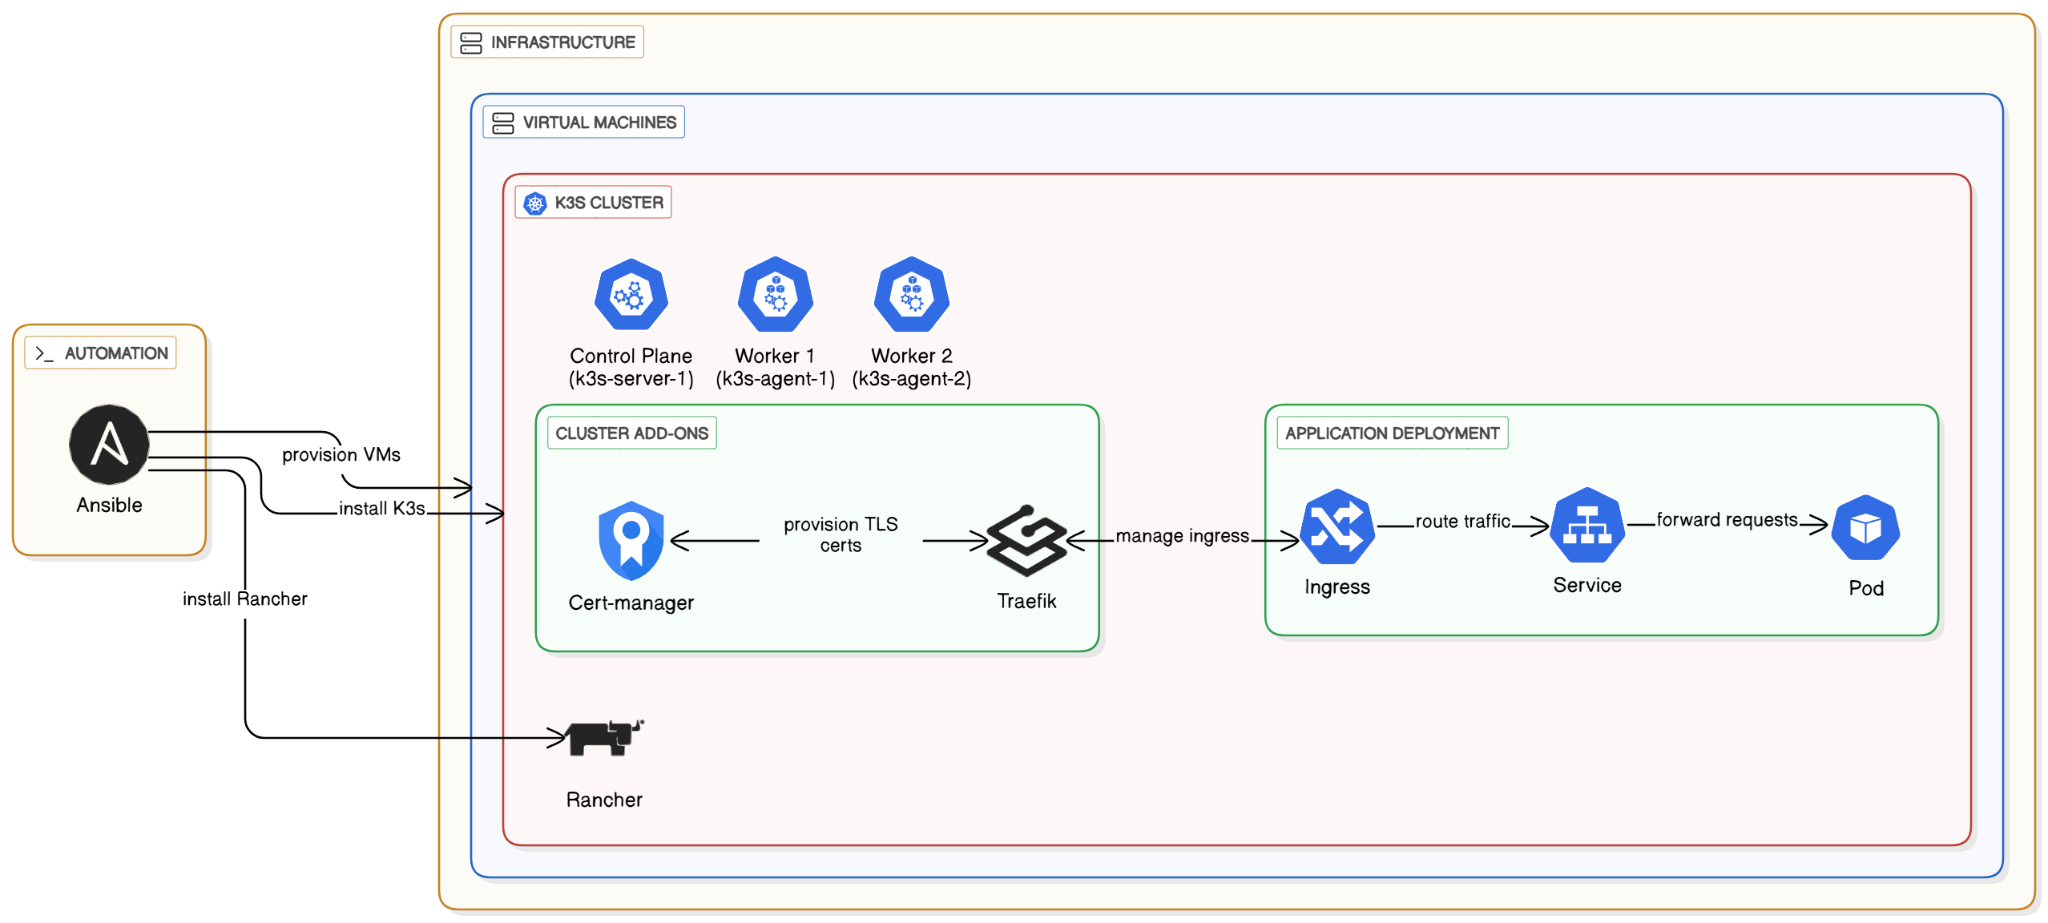
- Ansible: An agentless automation tool to provision our infrastructure (Virtual Machines) and configure them.
- K3s: A lightweight, certified Kubernetes distribution.
- Cert-manager: A Kubernetes add-on to automate the management and issuance of TLS certificates.
- Traefik: A modern HTTP reverse proxy and load balancer that comes built-in with K3s to handle our Ingress traffic.
- Rancher: An open-source management platform that provides a web UI to simplify deploying and managing applications on our Kubernetes cluster.
The process will involve using Ansible to create VMs, then using another Ansible playbook to install a multi-node K3s cluster. Finally, we will deploy a test application and expose it securely with HTTPS.
We need to set up our local control machine with the necessary tools to orchestrate the deployment. We will use pipx to install Ansible in an isolated environment, which is a modern best practice.
Inside your WSL terminal
Update your system and install pipx
$ sudo apt update
$ sudo apt install pipx
$ pipx ensurepath
Install Ansible and openstack using pipx:
$ pipx install --include-deps ansible
$ pipx inject ansible openstacksdk
Visit the code in your folder inside your WSL terminal
cd guestbook-src/09_k3s_rancher
Now we will use an Ansible playbook to create the virtual machines that will form our cluster.
Run the provisioning playbook:
- Configure
os_key_nameininventory/configand set it to your Switch Engines key pair - From within your Ansible project directory, execute the playbook.
$ ansible-playbook -i inventory provision.yml
Verify the Ansible Inventory:
Once the provisioning is complete, your new servers should be ready. You can visualize the inventory structure with the ansible-inventory command to verify that the openstack dynamic inventory works as expected.
$ ansible-inventory -i inventory --graph
You should see an output similar to this, confirming you have one server and two agent nodes.
@all:
  |--@ungrouped:
  |--@k3s_cluster:
  |  |--@agent:
  |  |  |--k3s-agent-1
  |  |  |--k3s-agent-2
  |  |--@server:
  |  |  |--k3s-server-1
With our VMs ready, we'll now use a specialized Ansible collection to deploy K3s across them.
Install the K3s Ansible Collection:
Ansible Collections are a way to package and distribute playbooks, roles, modules, and plugins. We'll install the official collection for K3s directly from its Git repository.
$ ansible-galaxy collection install git+https://github.com/k3s-io/k3s-ansible.git
Run the K3s Orchestration Playbook:
The collection provides a master playbook to handle the entire cluster setup. It will install the K3s server on the k3s-server-1 node and join the other two nodes as agents.
$ ansible-playbook -i inventory k3s.orchestration.site.yml
Verify the Cluster:
Once the playbook finishes, SSH into your server node to verify that the cluster is up and all nodes have joined successfully with kubectl get nodes.
Or just run kubectl command via ansible shell
$ ansible -i inventory k3s-server-1 -become -m shell -a "kubectl get nodes"
The output should show all three nodes in a Ready state.
NAME           STATUS   ROLES                  AGE     VERSION
k3s-agent-1    Ready    <none>                 2m55s   v1.28.x+k3s1
k3s-agent-2    Ready    <none>                 2m55s   v1.28.x+k3s1
k3s-server-1   Ready    control-plane,master   3m25s   v1.28.x+k3s1
Rancher is an open-source management platform that provides a web UI to simplify deploying and managing applications on our Kubernetes cluster. We are installing it to provide a user-friendly web interface, which simplifies the process of deploying applications and managing the cluster without relying solely on the command line.
- Register Three DNS Names:
Go to your DNS provider (e.g., DuckDNS) and create threeArecords. All records should point to the public IP address of yourk3s-server-1node.
rancher-.duckdns.org podinfo-.duckdns.org guestbook-.duckdns.org
- Configure Ansible
Inventory/configfile for Rancher:
We need to tell our installation playbook what hostname to use for Rancher.
- in
inventory/configupdaterancher_hostname - change password if you want.
Run the Playbook:
This will take several minutes.
$ ansible-playbook -i inventory install-rancher.yml
Access Rancher:
Open your browser and navigate to https://rancher-username.duckdns.org. You should see the Rancher login page.
- Use
adminand the password from yourinventory/config
Navigate to your Cluster:
Ensure you are inside the local cluster dashboard.
Create a Namespace:
- In the left menu, go to Cluster -> Projects/Namespaces.
- Click the Create Namespace button under default project.
- Name:
podinfo - Click Create.
Create the Let's Encrypt Issuer
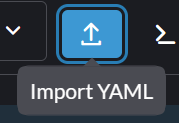
For resources with complex configurations like Issuers and Ingresses, using the YAML editor is needed, Rancher UI does not know all options.
- In the top-right of the Rancher UI, click the Import YAML icon.
- Select the
podinfonamespace in the dropdown - Paste the following YAML into the editor. Change the email address!
apiVersion: cert-manager.io/v1
kind: Issuer
metadata:
  name: letsencrypt-podinfo-issuer
  namespace: podinfo
spec:
  acme:
    # IMPORTANT: Change this to your email address
    email: your-email@he-arc.ch
    server: https://acme-v02.api.letsencrypt.org/directory
    privateKeySecretRef:
      name: letsencrypt-podinfo-issuer-account-key
    solvers:
    - http01:
        ingress:
class: traefik- Click Import.
Create the Deployment and Service
In the left menu, go to Workload -> Deployments.
Click Create.
- Name:
podinfo - Containers -> Image:
stefanprodan/podinfo - Namespace: Select
podinfofrom the dropdown. - Under Port Mapping, click Add Port and use: Service Type:
ClusterIP,Name:http,Container Port:9898
Click Create.
Rancher will automatically create both the Deployment and the associated ClusterIP Service.
Create the Ingress
- Go to Service Discovery -> Ingresses.
- Click Create
- Click Edit as YAML (at the bottom)
- Paste the following YAML. Change the hostname in both places!
apiVersion: networking.k8s.io/v1
kind: Ingress
metadata:
  name: podinfo-ingress
  namespace: podinfo
  annotations:
    cert-manager.io/issuer: letsencrypt-podinfo-issuer
spec:
  ingressClassName: traefik
  rules:
    - host: podinfo-<username>.duckdns.org # <--- CHANGE THIS
      http:
        paths:
          - path: /
            pathType: Prefix
            backend:
              service:
                name: podinfo
                port:
                  number: 9898 # The container port, Rancher names the service after the deployment
  tls:
    - hosts:
      - podinfo-<username>.duckdns.org # <--- CHANGE THIS
secretName: podinfo-tls-cert- Click Create.
Access Your Application:
Open a web browser and navigate to https://podinfo.your-domain.com. It may take a minute for the certificate to be issued. You should see the Podinfo UI with a valid HTTPS lock.
Manually Scale with the UI
- Go to Workload -> Deployments.
- Find the
podinfodeployment. - Click the Plus next to Scale to scale up to 2 pods. The UI will update as the new pod becomes ready.
Change an Environment Variable with the UI
- Click the three-dot menu on the right of the
podinfodeployment and select Edit Config. - Scroll down to Environment Variables and click Add Variable.
- Variable Name:
PODINFO_UI_MESSAGE - Value:
Welcome from my Rancher-managed Cluster! - Click Save. Rancher will trigger a rolling update.
- Check the application's web page to see the new message.
Task Progress Check
Take a screenshot showing:
- The Rancher UI, with the
podinfodeployment scaled to 2 pods. - Your browser successfully connected to the
podinfoapplication over HTTPS, showing the custom message.
Upload the combined screenshot to complete the lab.
We will use the cluster in next labs, do not delete it, but you can scale down to 0 the podinfo deployment.