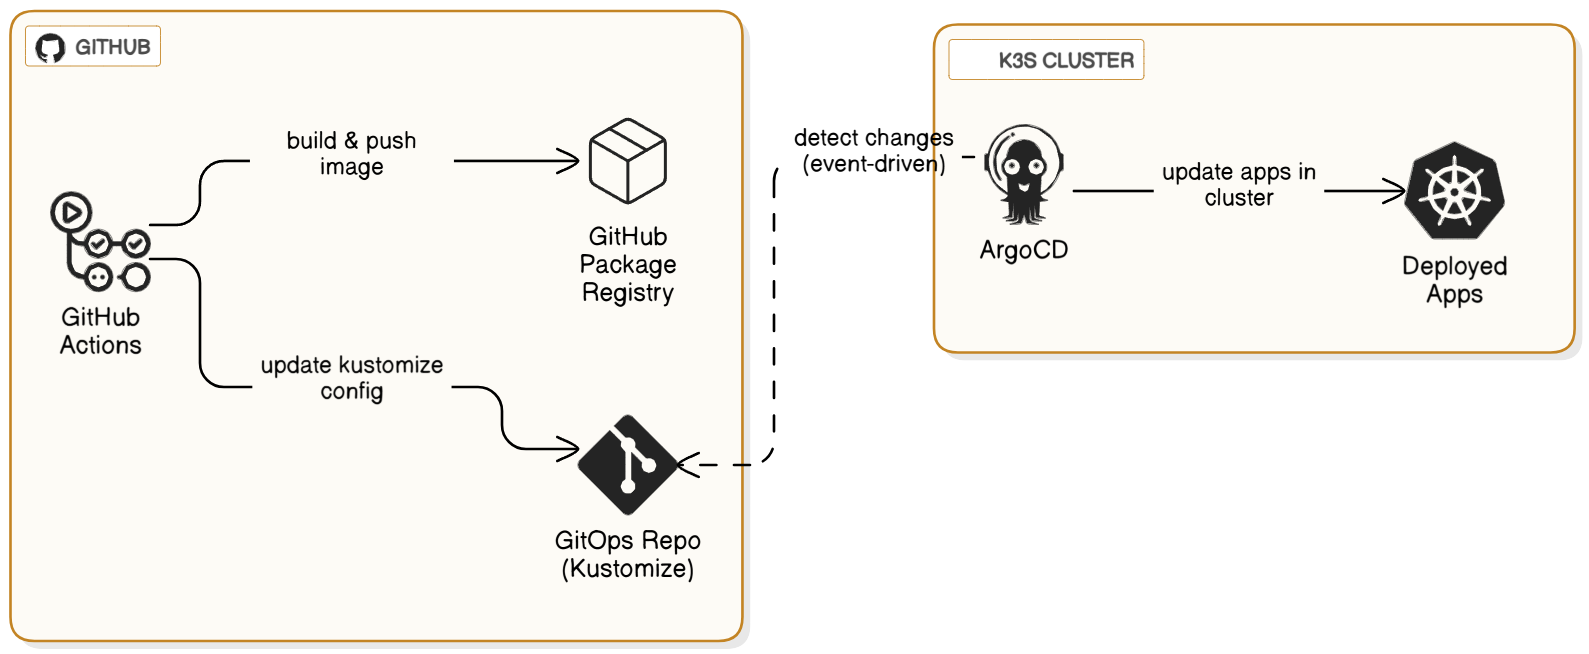
In this lab, we will implement a true GitOps workflow. GitOps is a paradigm for managing cloud-native applications where a Git repository is the single source of truth for both application code and infrastructure configuration.
- Continuous Integration (CI): We will use GitHub Actions to automatically build our application's container image and update its deployment manifest whenever we push new code.
- Continuous Deployment (CD): We will install Argo CD, a declarative GitOps tool for Kubernetes. Argo CD will continuously monitor our configuration repository and automatically apply any changes to our cluster, ensuring the running state always matches what's defined in Git.
This creates a powerful, automated loop: git push -> build & test -> publish image -> update config -> deploy to kubernetes.
Prerequisites
This lab requires a running K3s cluster managed by Rancher, as configured in a previous lab
We will use GitHub for our CI process. We will use Git Repository, GitHub Actions to build the images and GitHub Packages to store the images.
Fork the GitOps Repository
Navigate to https://github.com/bfritscher/guestbook-gitops and click the Fork button to create a copy in your own GitHub account.
Personalize Your Repository
git clone your forked repository to your local machine.
You now need to replace several placeholder values in the repository files. Use your code editor's "Find and Replace in Files" feature.
- Search for:
your-username/guestbook-gitopsand replace with:your-github-username/guestbook-gitops. - Search for:
your-email@he-arc.chand replace with: your actual email address. - Open and change the
hostfromgb-heg.duckdns.orgto a new DNS name you control (e.g.,guestbook-username.duckdns.org, you configured in a previous lab). Point this new DNS record to yourk3s-server-1IP address.
Commit and Push
Commit the changes and push them to your repository's main branch.
Check the CI Pipeline
In your GitHub repository, click the Actions tab. You will see a workflow running, triggered by your push.
Click on the workflow to see the steps: build, push to container registry, and update manifests.
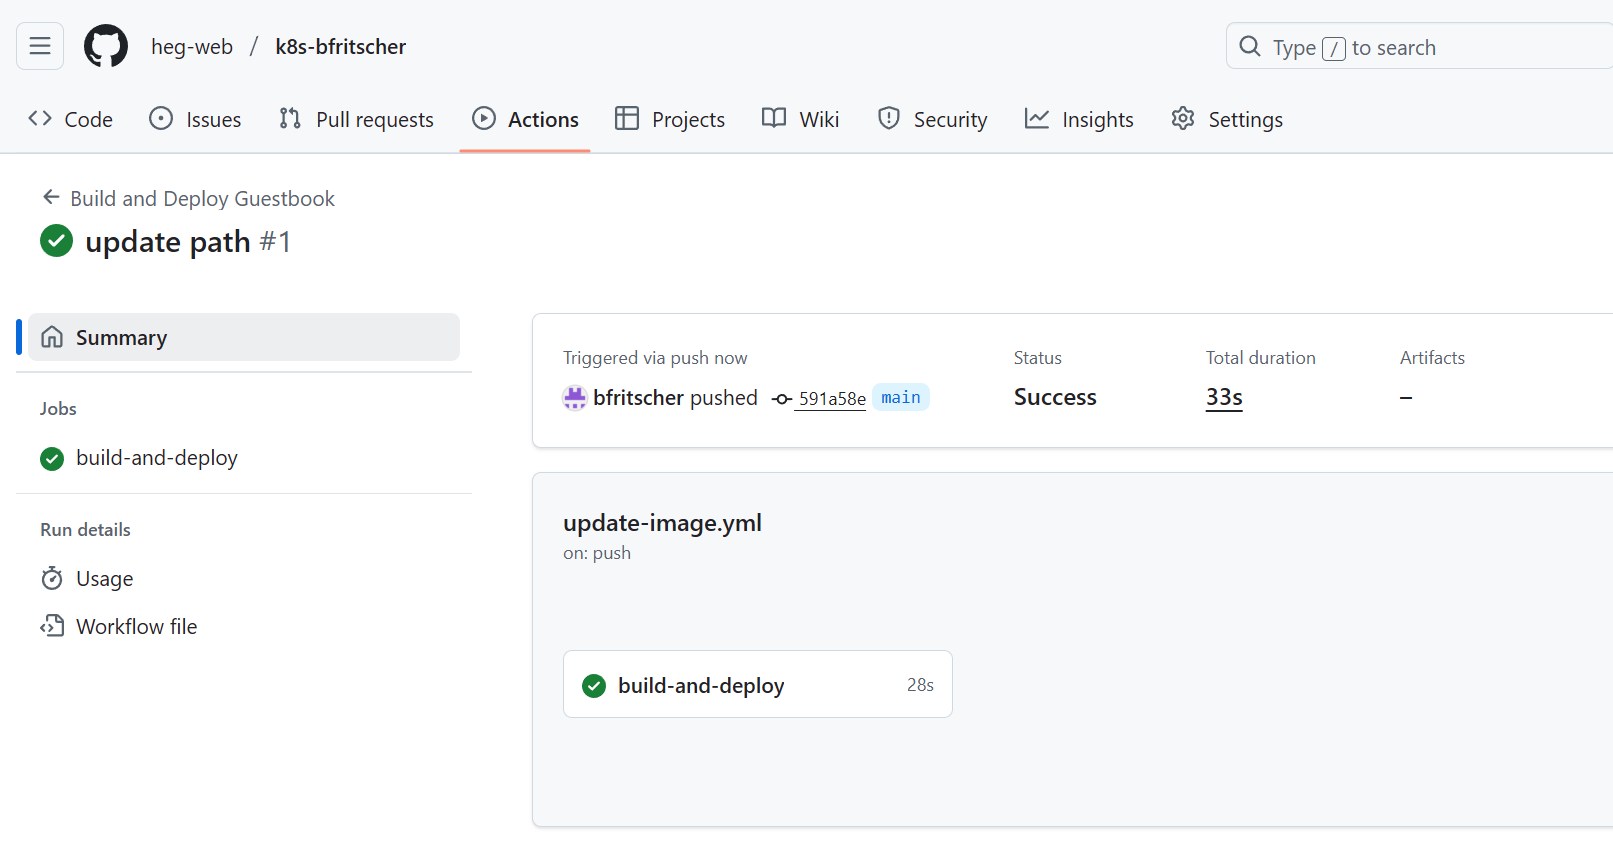
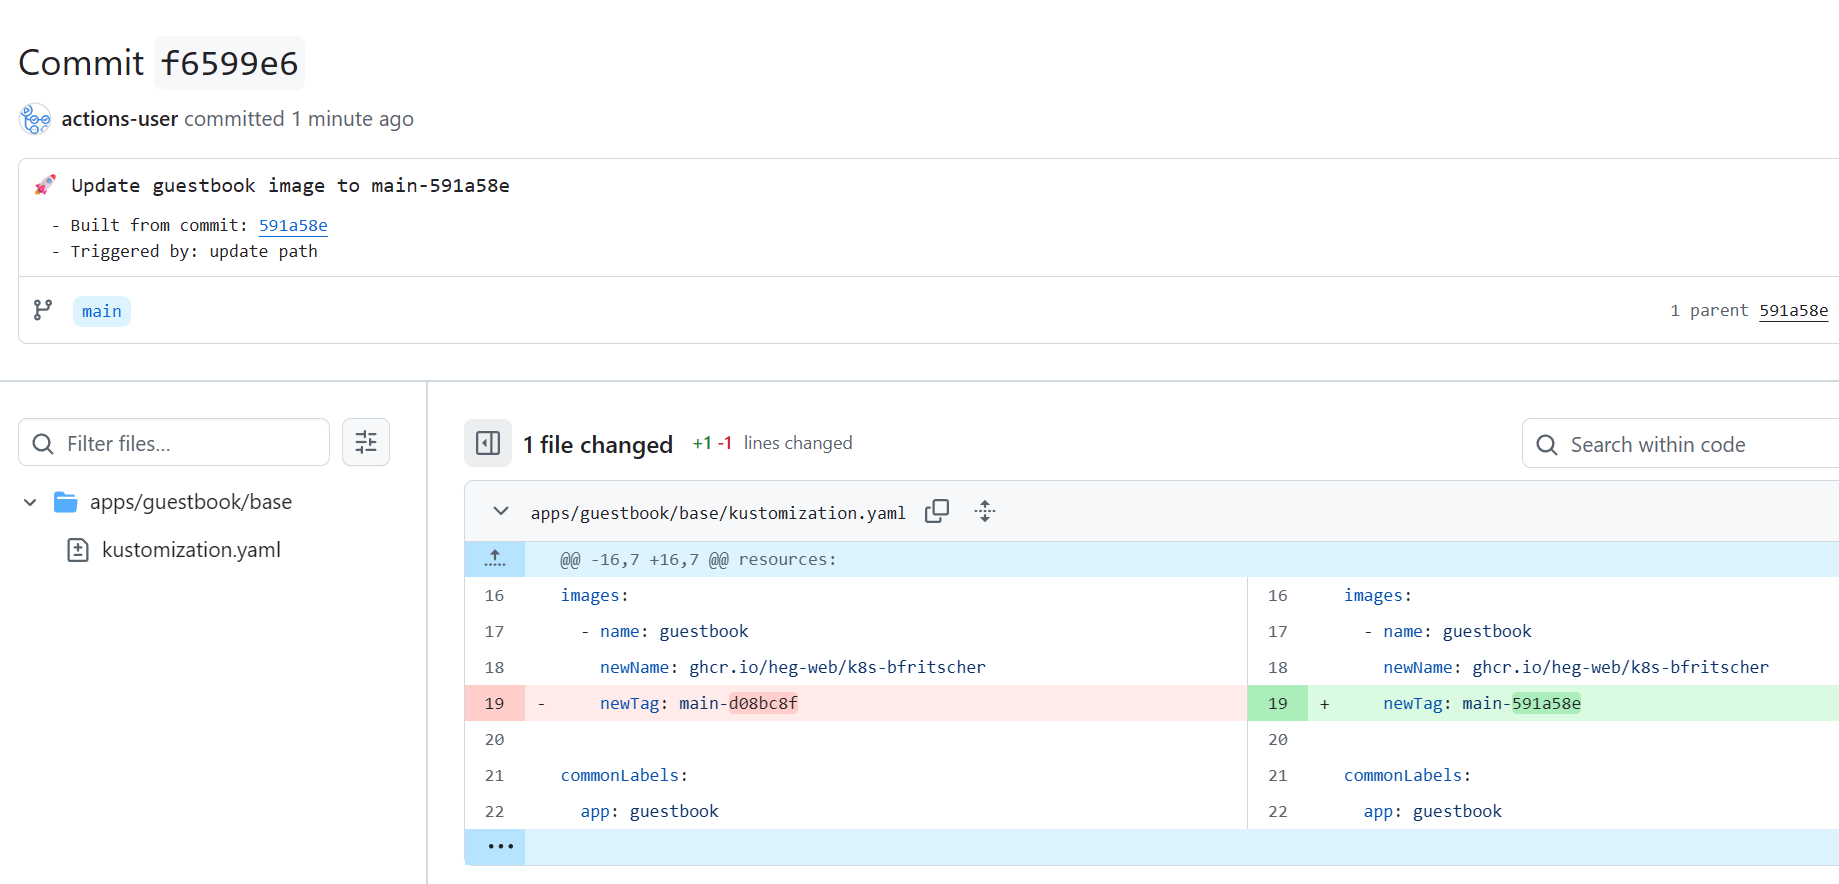
Once it completes, go to your repository's main page. You will see a new commit authored by "github-actions[bot]". This commit updated the image tag in the apps/guestbook/base/kustomization.yaml file.
Make the Container Package Public
On your repository's main page, find the Packages section on the right. Click on your new guestbook-gitops package.
- Click Package settings.
- Scroll to "Danger Zone" and click Change visibility. Select Public and follow the prompts.
This allows your Kubernetes cluster to pull the image without special credentials.
Now we'll install Argo CD into our cluster to handle the deployment part of the workflow.
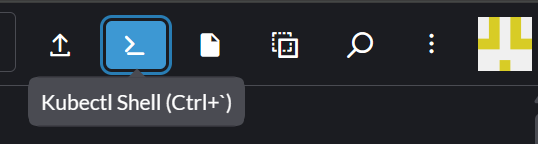
Open Rancher Kubectl Shell
Log in to your Rancher UI and navigate to your local cluster. Click the Kubectl Shell icon in the top-right corner.
Install Argo CD
Execute the following commands in the shell:
$ kubectl create namespace argocd
$ kubectl apply -n argocd -f https://raw.githubusercontent.com/argoproj/argo-cd/stable/manifests/install.yaml
Retrieve the Admin Password
Argo CD creates an initial admin password in a secret. Use Rancher'UI to find the argocd-initial-admin-secret in the Rancher UI (Storage -> Secrets) and decode the value from there.
Access the Argo CD UI
For security, the Argo CD UI is not exposed via an Ingress by default. We will use kubectl port-forward to access it from our local machine.
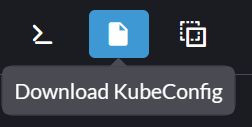
First, get the kubeconfig file for your cluster from the Rancher UI. Go to the local cluster dashboard, and in the top right, click the Kubeconfig button.
Save the file as local.yaml on your machine.
In a new terminal window on your local machine, run the following command. This command will run continuously.
$ kubectl --kubeconfig local.yaml port-forward svc/argocd-server -n argocd 8080:443
Log In to Argo CD
Open a browser and navigate to https://localhost:8080
Your browser will warn you about an invalid certificate. This is expected; click "Advanced" and proceed.
Username: admin
Password: The password you decoded in the previous step.
We will now tell Argo CD to monitor our forked repository. We'll use the "App of Apps" pattern, where one root Argo CD application manages the deployment of other applications.
Apply the Root Application
In another new terminal, navigate to your cloned guestbook-gitops repository directory and apply the root app manifest. Keep the other proxy open and your browser window open to see the live changes.
$ kubectl --kubeconfig local.yaml apply -f argocd/app-of-apps.yaml
Watch the Magic in the UI
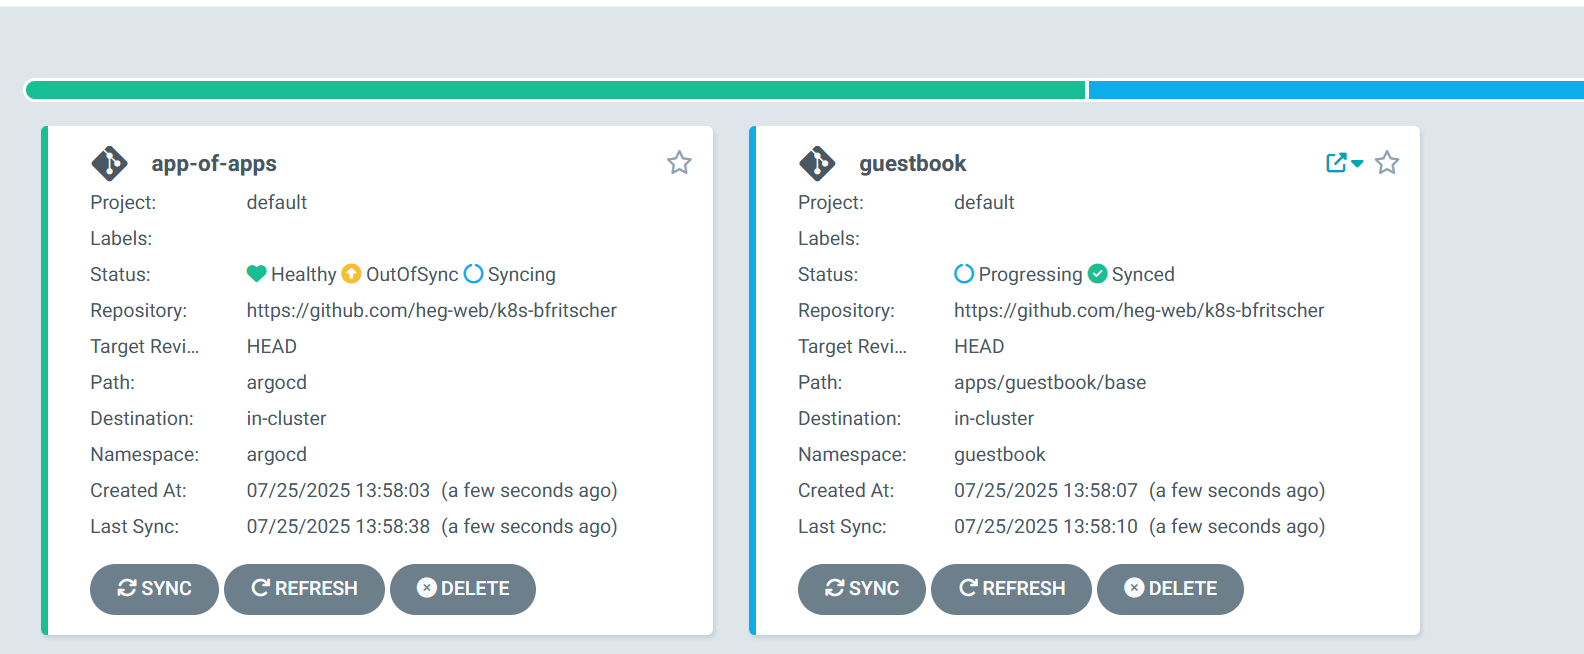
- Switch back to your Argo CD browser window. You will see a new application called
app-of-apps. - Click on it. You will see it is responsible for deploying another application called
guestbook. - Click on the
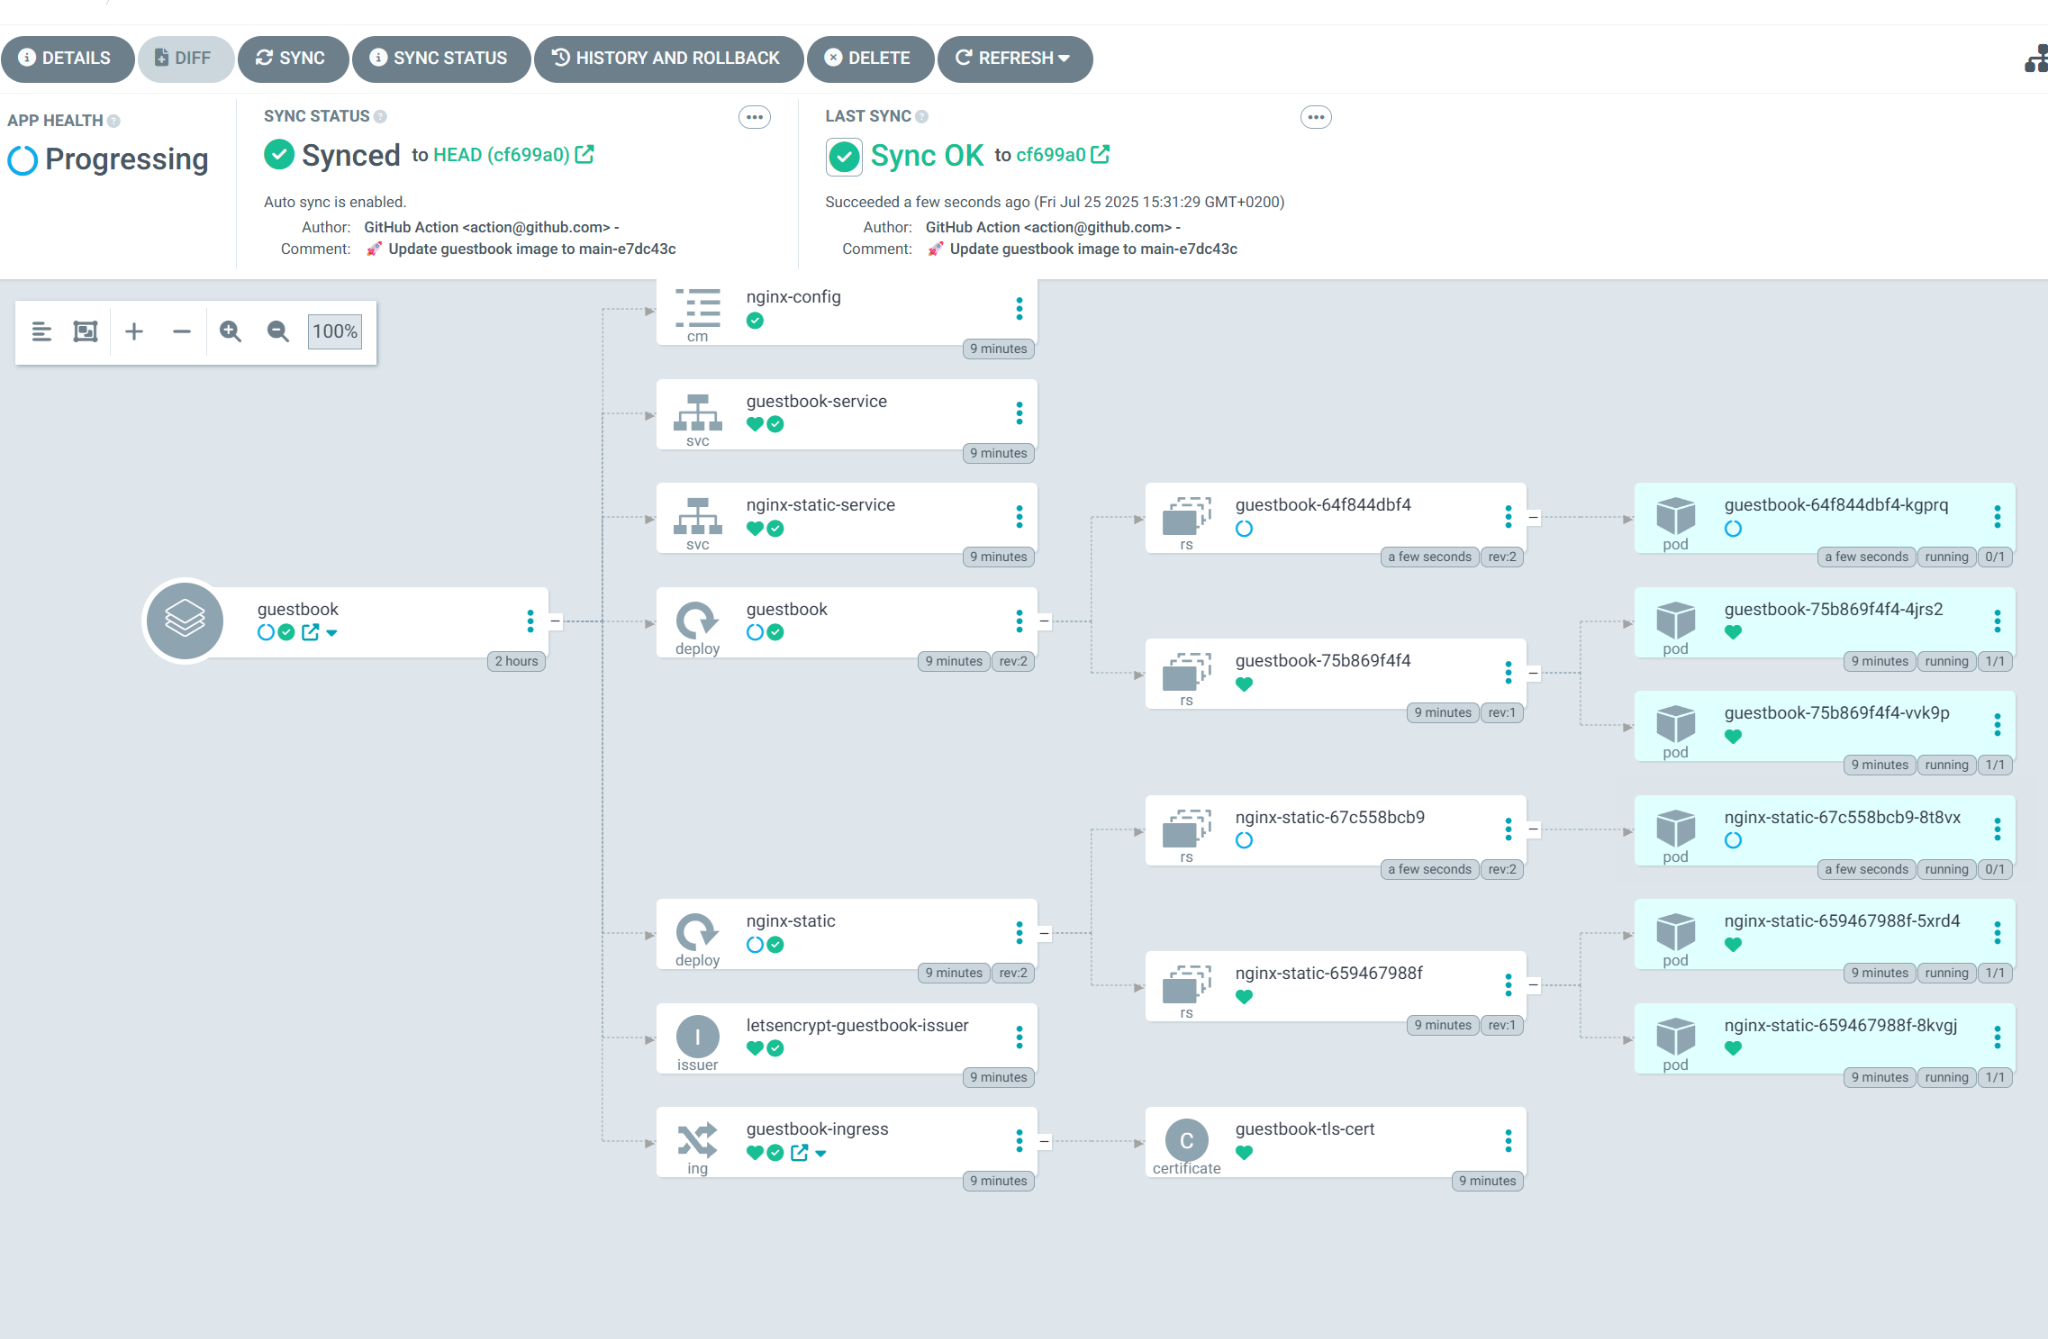
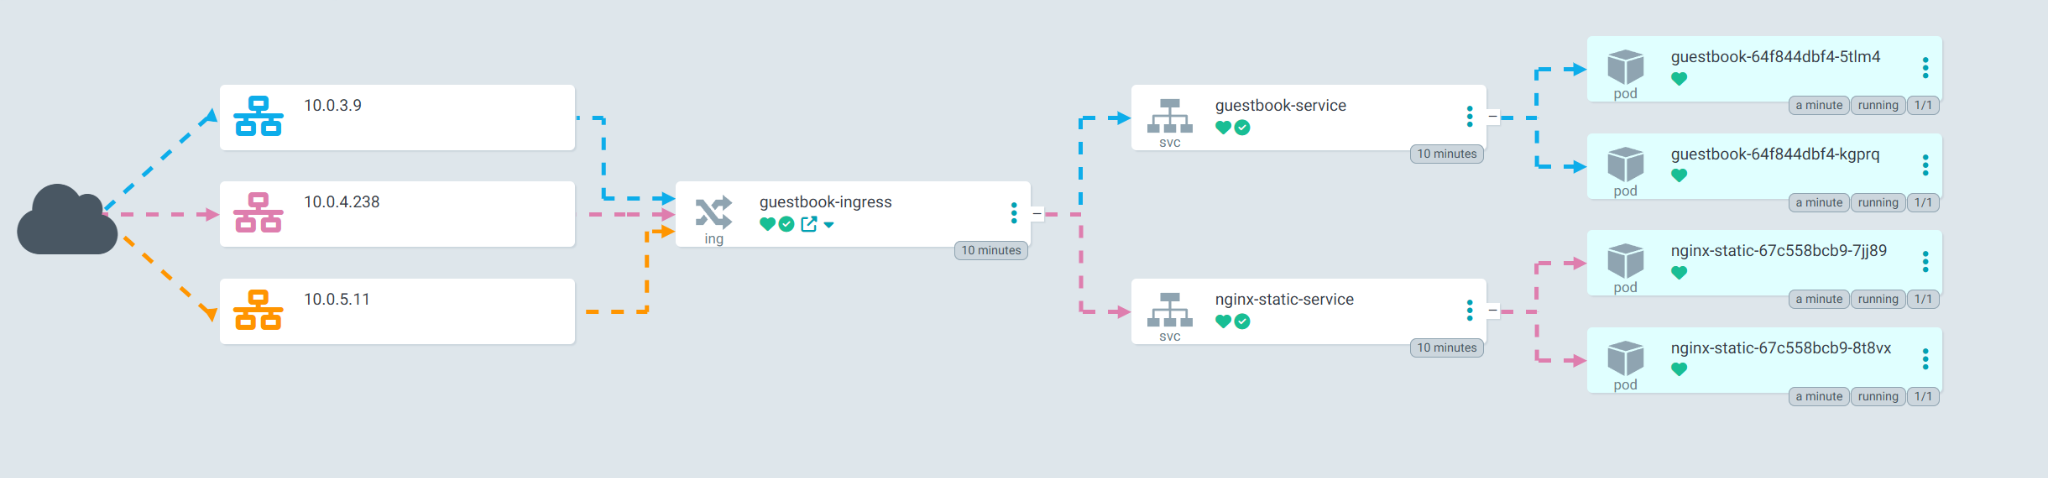
guestbookapplication. Argo CD will now show you the full tree of Kubernetes resources it is creating: Ingress, Services, and Deployments.
Initially, the status will be OutOfSync, but Argo CD will quickly start synchronizing, and the status will change to Healthy and Synced.
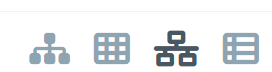
You can switch views on the top right
Test the Guestbook
Once everything is Healthy and Synced, open a browser and navigate to the DNS name you configured for the guestbook (guestbook-username.duckdns.org). You should see the application running.
Let's trigger the full CI/CD pipeline with a simple code change.
1. Make a Code Change
On your local machine, edit a file in the application source. For example, open src/templates/index.html.
- Find the
h1tag and change the text fromGuestbooktoMy GitOps Guestbook. - And change the image url from
sign_here.pngtosign_here_v2.png
2. Commit and Push
3. Observe the CI/CD Pipeline
CI (GitHub): Go to the Actions tab in your GitHub repository. A new workflow is running. Wait for it to build the new image and push the commit that updates the image tag.
CD (Argo CD): Go to the Argo CD UI. After a minute or two, Argo CD will detect that the HEAD of the main branch has changed. The guestbook application status will change to OutOfSync.
- Click the Refresh button on the
guestbookapp to speed up detection if you're impatient. - Argo CD will automatically start synchronizing the change, creating a new ReplicaSet and performing a rolling update of the pods. You can see the old pod being terminated and the new one starting up.
4. Verify the Change
Once the application is Synced and Healthy again, refresh the guestbook page in your browser. You should see the new title, "My GitOps Guestbook". The entire update happened automatically after your git push.
Task Progress Check
Take a screenshot showing:
- The Argo CD UI with the
guestbookapplication in aHealthyandSyncedstate. - Your browser showing the running guestbook application with the modified title
My GitOps Guestbook.
Upload the combined screenshot to complete the lab.
If you finished all your labs and want to really clean up, you can destroy the 3 VMs of your cluster in the switch engines console.