Objectif: You will build the back-end of a tool that manages orders of a delivery company.
First you will setup the environment. Then we will get into the requirements for the small application.
You must commit and push your code into your repository created with the following classroom link:
Install python3
You need to do the initial configuration as described below :
cd django-exercises-xyz  # to your cloned repository

# Create a virtual environment to isolate our package dependencies locally
# for windows cmd
python -m venv env
env\Scripts\activate.bat
# or for windows powershell
env\Scripts\Activate.ps1

# for linux / macos
python3 -m venv env
source env/bin/activate

# Install Django and Django REST framework into the virtual environment
pip install django
pip install djangorestframework

# Set up a new project with a single application
# Note the trailing '.' character
django-admin startproject parcel_project .
django-admin startapp parcel_manager
Synchronize your database :
python manage.py migrate
Create a user named admin and use the password password123
python manage.py createsuperuser --email admin@example.com --username admin
Check that everything works by running the server and opening the adresse in the browser http://127.0.0.1:8000/
python manage.py runserver
Ctrl+C to exit
Start coding!
Use your preferred IDE or vscode with the python extension
Objective : Using Django Rest Framework, create a backend which could be used for the project Vue.js level 2 exercise. You will create the model, implement serializers to work with REST and configure some security settings for the users. This project will manage the delivery of parcels.
Order
Name | Type |
date | DateField |
sender | CharField |
destination | CharField |
weight | DecimalField |
status | "Confirmed", "In delivery", "Delivered" (CharField with choices) |
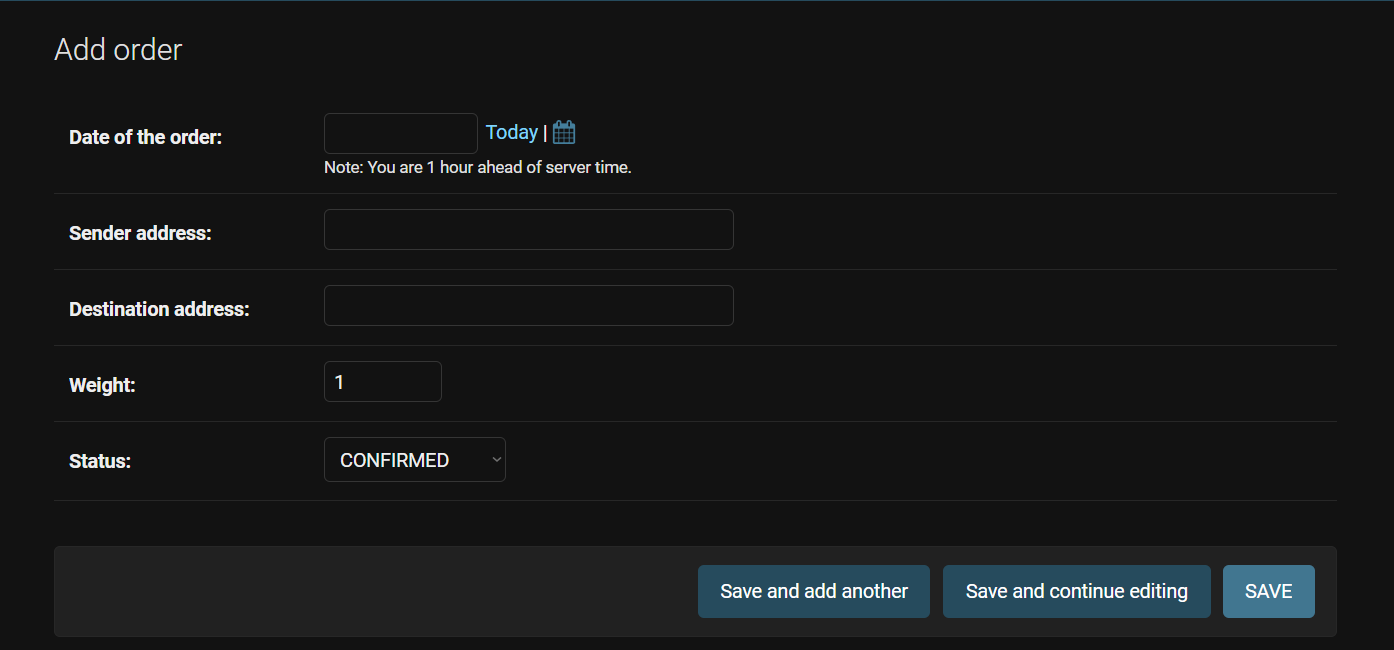
The model will be based on the data description above and will have the following restrictions :
- Sender / Destination : max 200 chars
- Weight : default value is 1.0
- Status : default status is «Confirmed » and must be a dropdown list.
It should display like this when you try to add a new order using the Django administration page.
Tasks
- Setup your app and rest_framework in your project
- Create the model with its fields and constraints
- Create and apply migrations
- Create the admin settings
The next step is to create a ModelSerializer to be able to use the Django Rest Framework. The serializer will use the model you have established before and the views you will add will allow to display your database on your browser. If you've done it correctly, you will be able to see the screen displayed below.
Tasks
- Create serializers.py
- Create a viewset
- Register the viewsets in the router and setup projet's url
- Create the admin settings
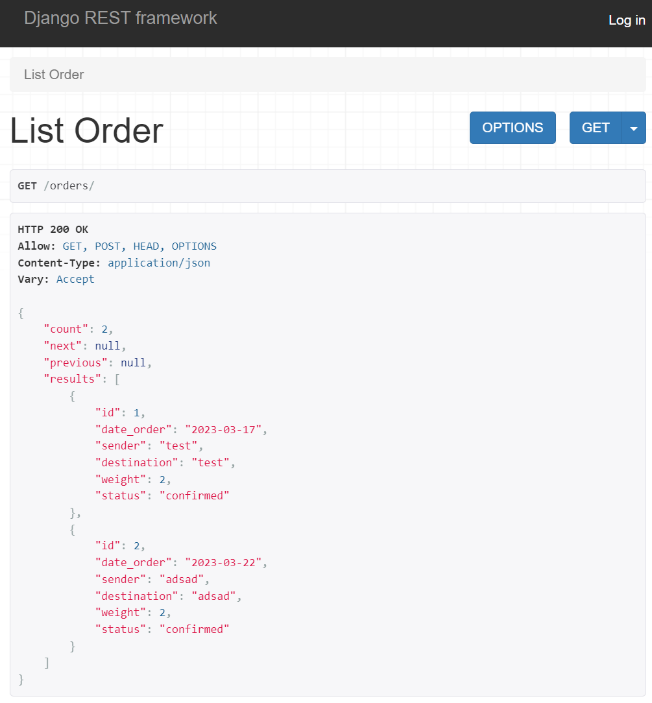
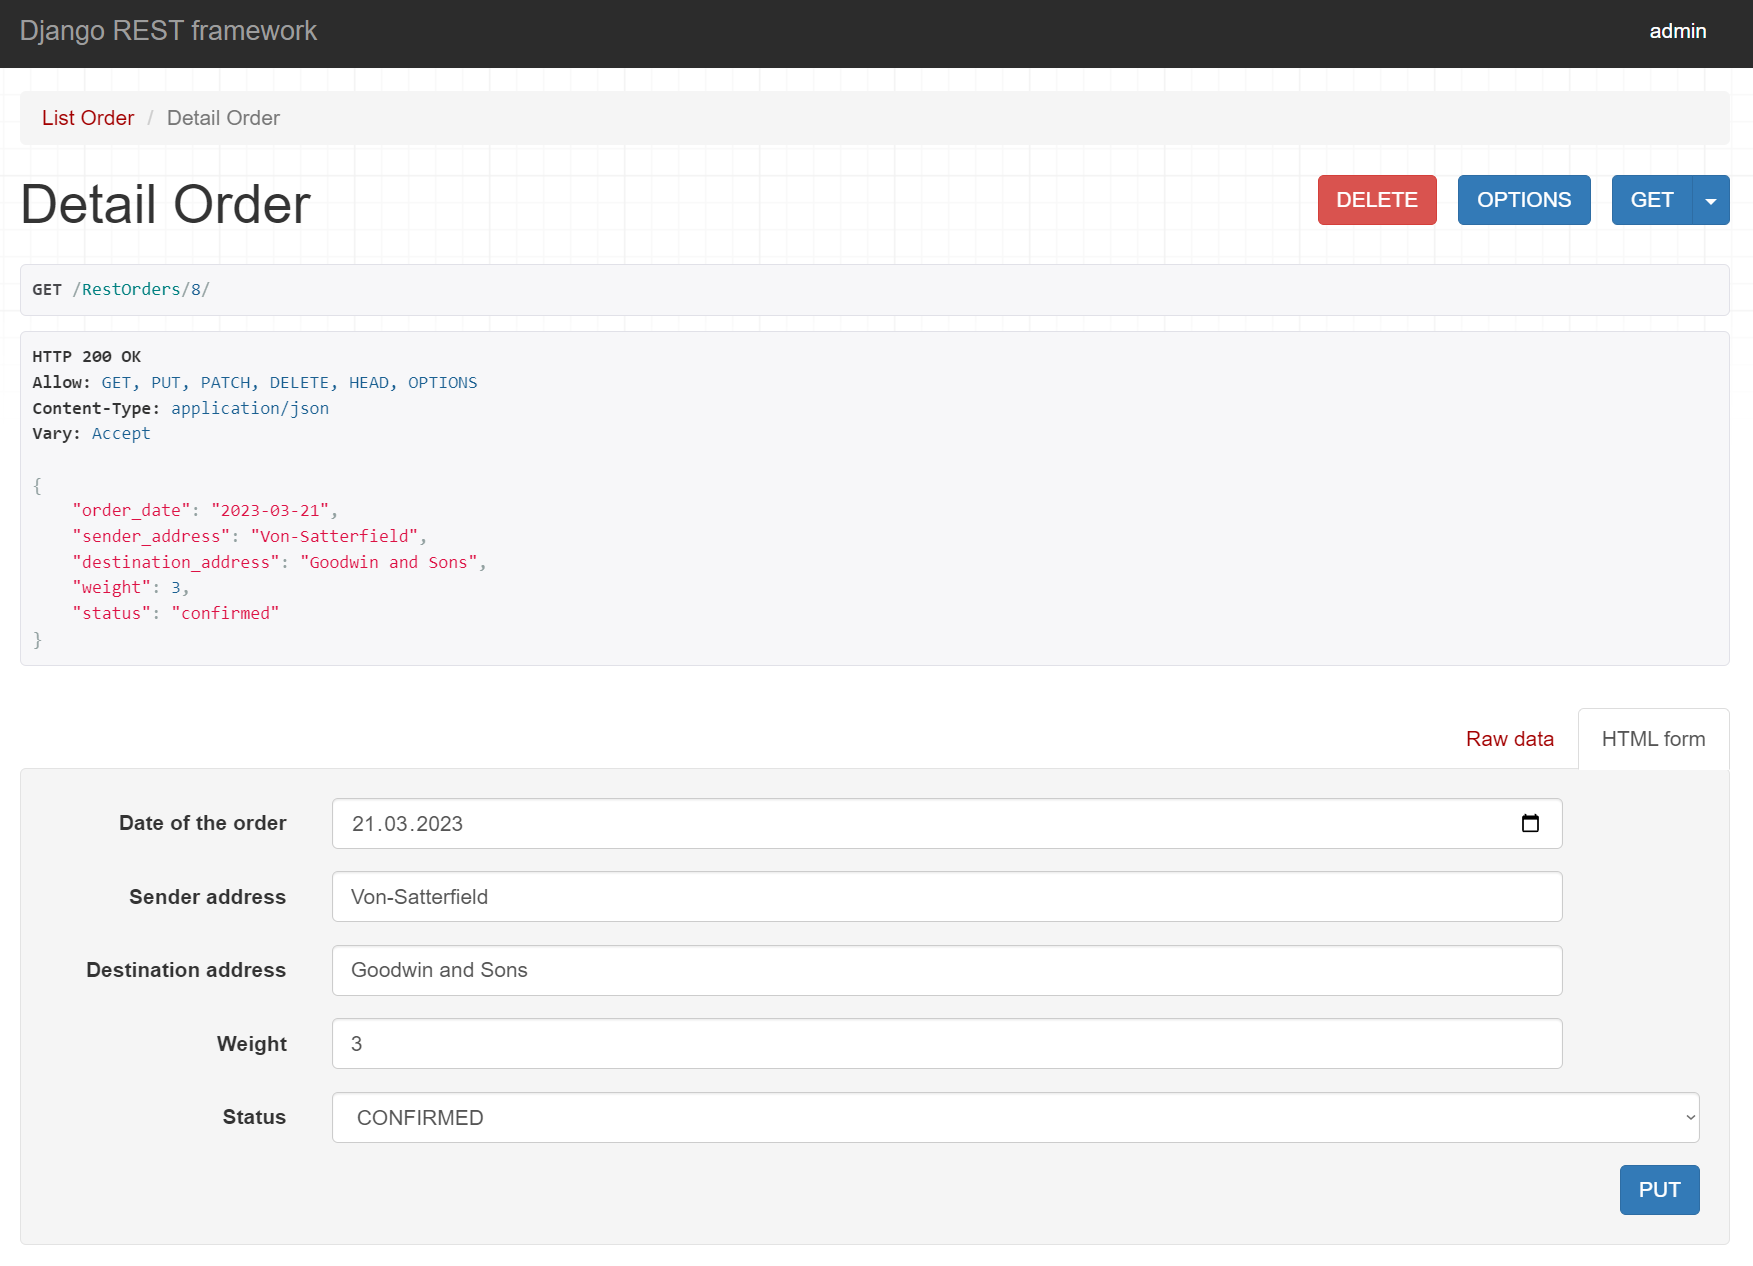
By using ViewSet, you will automatically have two views available. One to show the full list of data as shown above and another one showing the detail of one particular Order.
We will link a product to the parcel we have designed before. Therefore, create a new model of a product as follow :
Product
Name | Type |
name | CharField |
brand | CharField |
price | DecimalField |
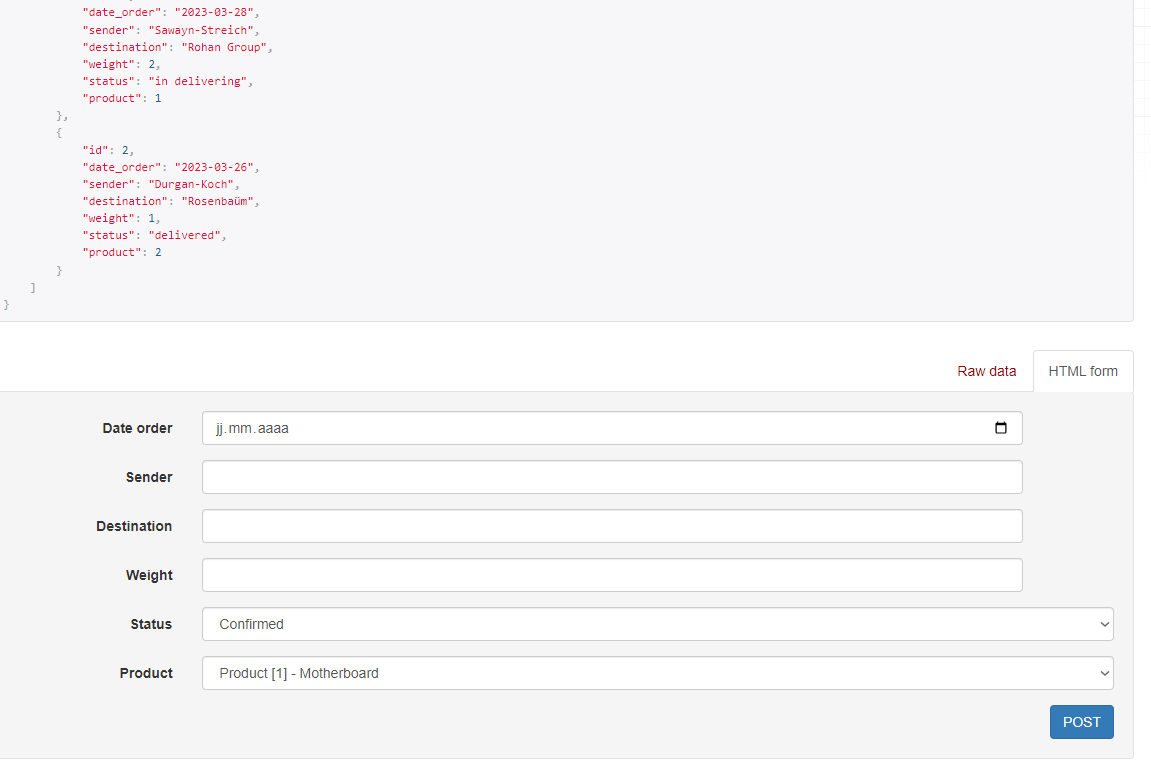
And then update the model of the order to have a field containing a product.
Order
Name | Type |
... | ... |
product | ForeignKey |
You can now populate your database by creating a few products and a few orders.
Tasks
- Create a new model and admin
- Create a serializer
- Create viewset and register the viewsets in the router
Create a few users to test different permissions on the project.
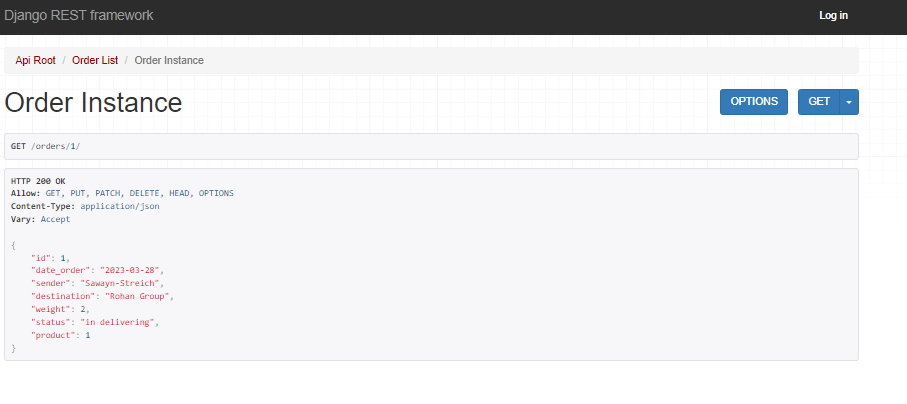
Add a login to the browsable API and make sure that only an authenticated user can add an order.
An authentified user can create/update/delete an Order/Product
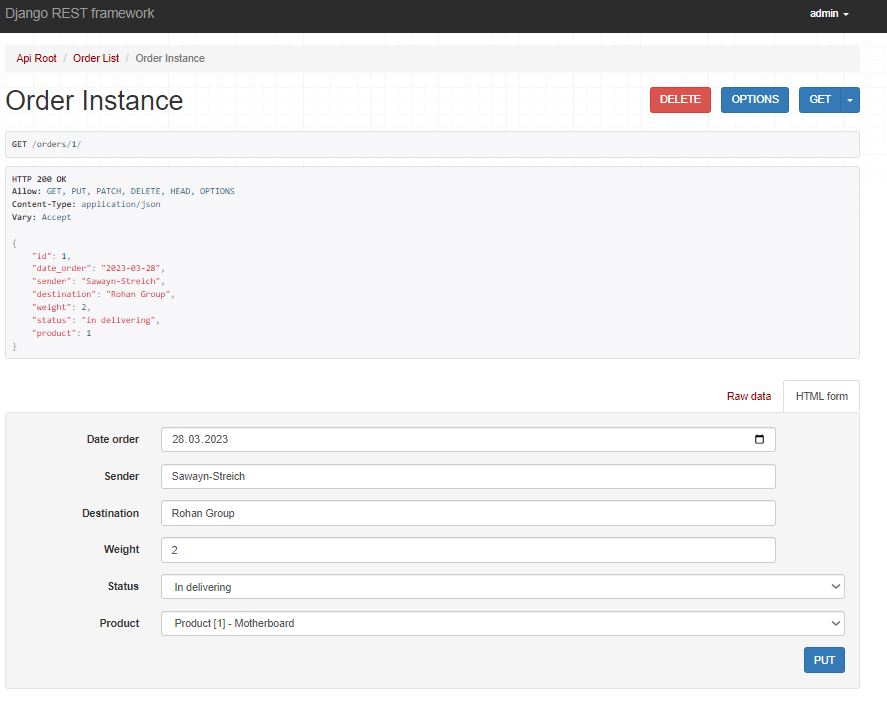
An un-authentified user can only read :
Congratulations, you covered the main concepts of Django and Django Rest Framework!
Learn more about models in the documentation.
Possible next steps:
- You can try to transform the Order model to support associating multiple products to a single order.
- Look into setting permissions on an object level (a user can only edit or see his own orders)
- Connect Vue.js with the rest API. (you will need to enable CORS) checkout the demo project for help