Welcome to this assignment where we'll explore the fundamentals of Git and GitHub for efficient code management and collaboration. Whether you're brushing up on your skills or diving into these concepts for the first time, we've got you covered.
Git is a free and open source distributed version control system designed to handle everything from small to very large projects with speed and efficiency. It allows multiple developers to collaborate on a project while maintaining a history of changes and easily managing different versions. The project's history is constructed through a sequence of commits, where each commit encapsulates a distinct set of changes made to the project's files.
State of files in a git repository

https://git-scm.com/book/en/v2/Git-Basics-Recording-Changes-to-the-Repository
Here's a brief overview of some key concepts in Git:
Untracked files: These are files that Git is not currently aware of. They have not been added to the version control system, and Git does not track changes in these files.
Unmodified files: Files that are already tracked by Git but have not been changed since the last commit are considered unmodified.
Modified files: When you make changes to a tracked file, Git recognizes it as modified. These changes could be additions, deletions, or modifications to the existing content.
Staged files: Staging is the process of preparing files for a commit. Staged files are those that you have marked for inclusion in the next commit. Staging allows you to selectively include changes from modified files.
Add file: To start tracking a new file or to stage modifications to an existing file, you use the git add command. This tells Git that you want to include the changes in the next commit.
Commit: A commit is a snapshot of the changes made to the files. Once you have staged the changes, you commit them to the version control system using the git commit command. Each commit has a unique identifier and contains information about the changes made.
Check if the git command is available in your terminal.
You can check that your user.name and user.email settings are configured correctly with:
git config --global --list
If the settings is not configured or wrong change it with:
git config --global user.name "John Doe"
git config --global user.email johndoe@example.com
GitHub is a platform that allows developers to create, store, manage and share their code. It uses Git software, providing the distributed version control of Git plus access control, bug tracking, software feature requests, task management, continuous integration, and wikis for every project.
Create Account
However, if you do not yet have an account you can create one here: https://github.com/signup
Educational Account (optional)
GitHub offers free access to its Copilot features and more through a student program.
If you did not already, activate education benefits for your account you can do it here: https://education.github.com/benefits?type=student
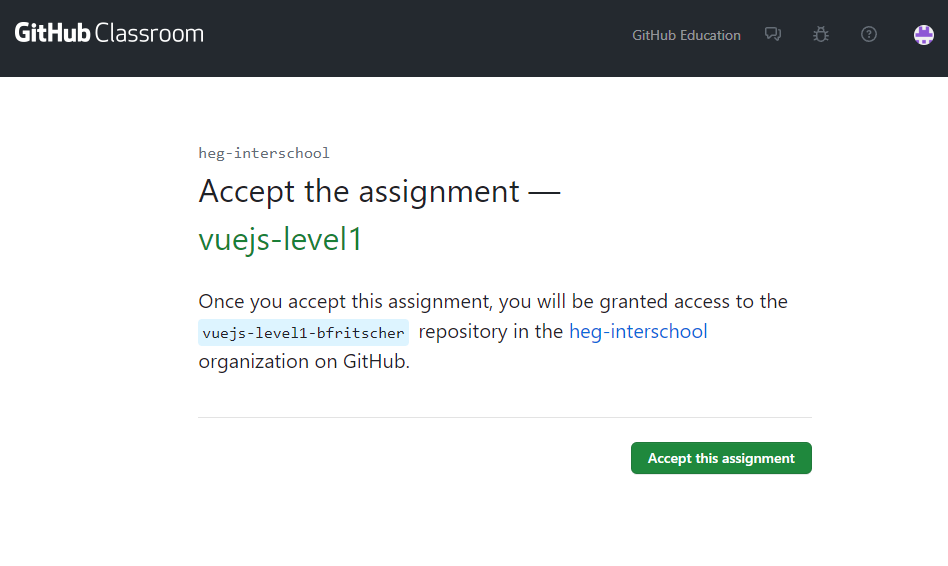
First accept the assignment, which will duplicate an existing GitHub repository for you to work on.
Accept the assignment
Refresh the page until you see a link

Clone your project
Copy your repository url from the green Code button.

On the terminal clone the repository from the server with the url you copied to the desired folder.
git clone https://github.com/heg-interschool/vuejs-level1-xyz.git c:\projects\vuejs-level1-xyz
We will create a new readme.md file and send it to the server. For this part we will use the free Visual Studio Code IDE.
Open the cloned project folder with File -> Open Folder
Create a branch
We currently are on the main branch of our Git Repository.
In Git, a branch is a parallel line of development that allows you to work on a specific feature or bug fix without affecting the main codebase. It essentially gives you a separate workspace to make changes independently. Branching enables collaborative and organized development, and you can later merge the changes back into the main branch. It's a powerful feature for managing and isolating different tasks within a project.
We will create a new branch for our readme feature.
On the bottom left click on main

Then create a new branch called readme.
(Optional) Equivalent Terminal Command
git checkout -b readme
Create a change
Create a readme.md Markdown file.
Visual Studio Code Can preview markdown in real time by clicking on the  icon.
icon.
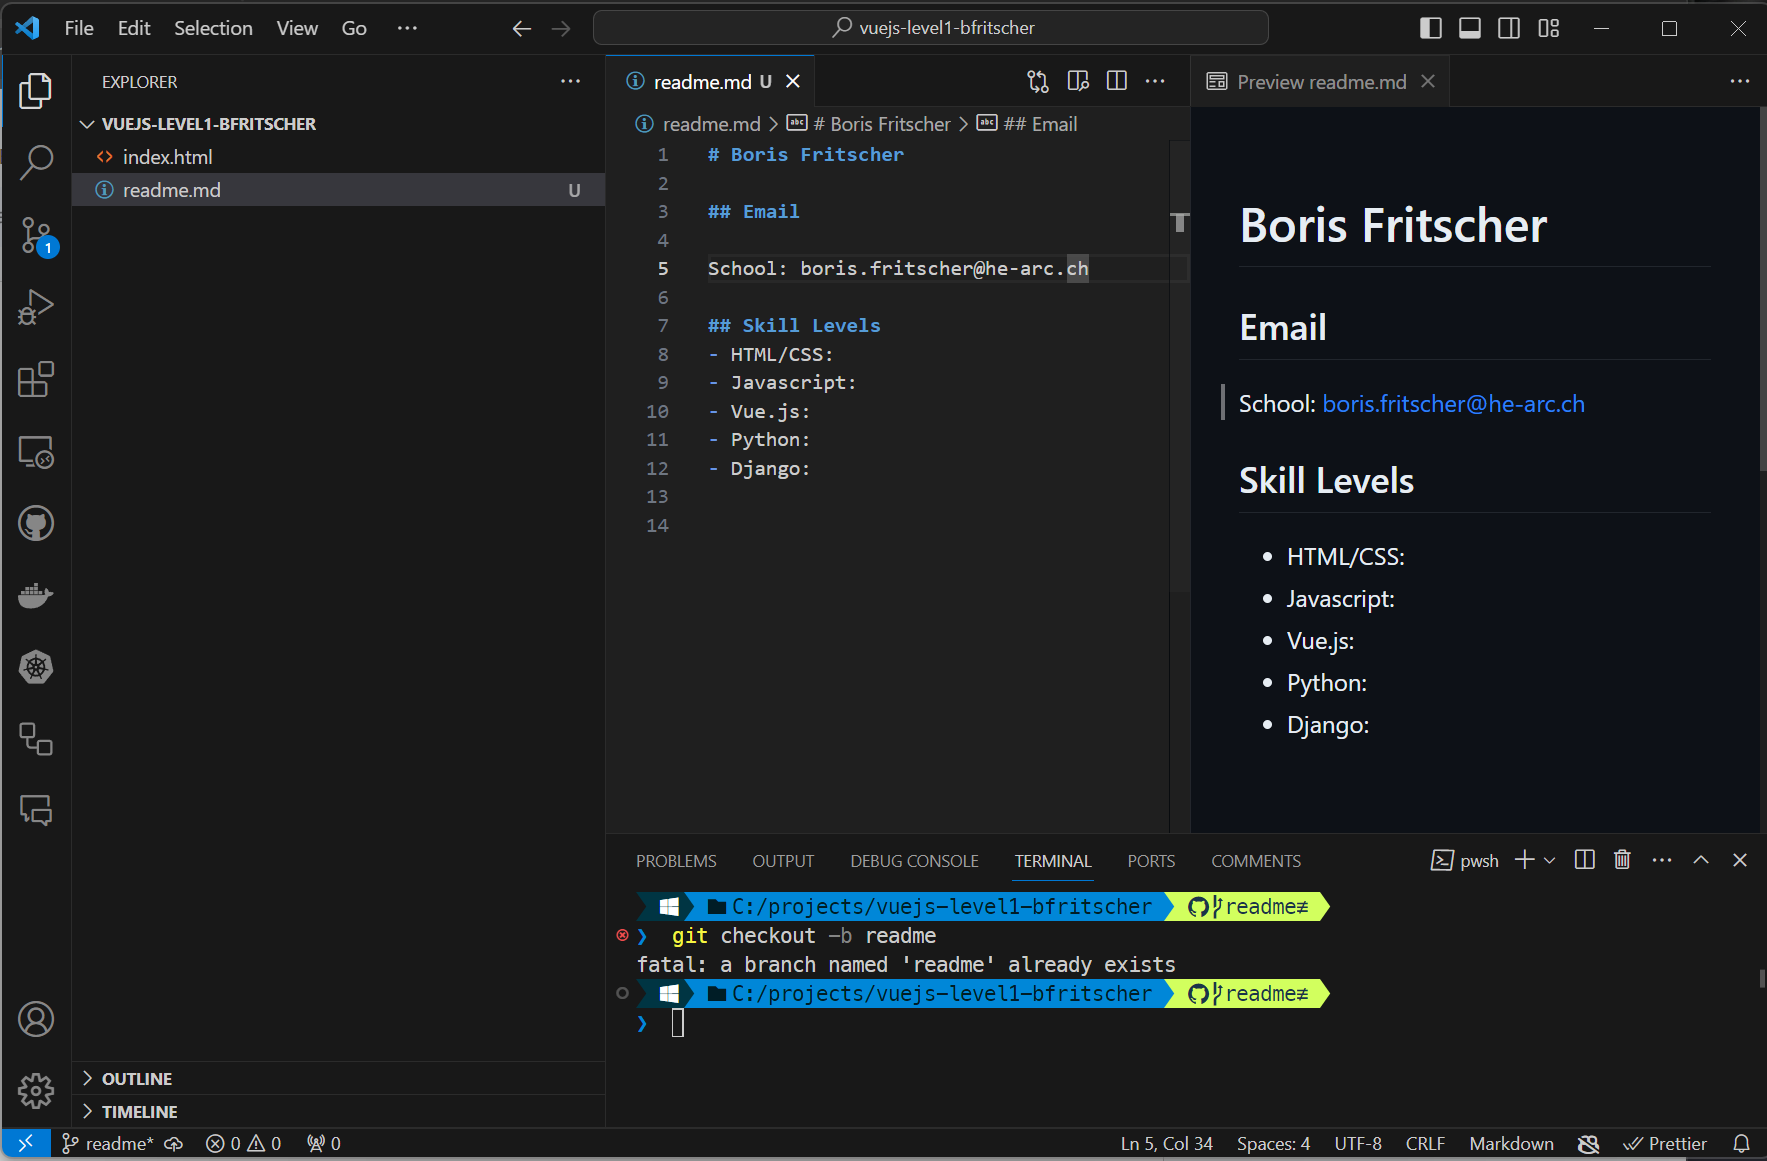
Use this base template as your content and adapt it to your name, email and skills.
# Your Name

## Email

School: your.school@email.ch

## Skill Levels
- HTML/CSS: some info/level
- Javascript: some info/level
- Vue.js: some info/level
- Python: some info/level
- Django: some info/level
- ...: some info/level
We now want to save our edits and send it to the server.
Commit and Push Changes
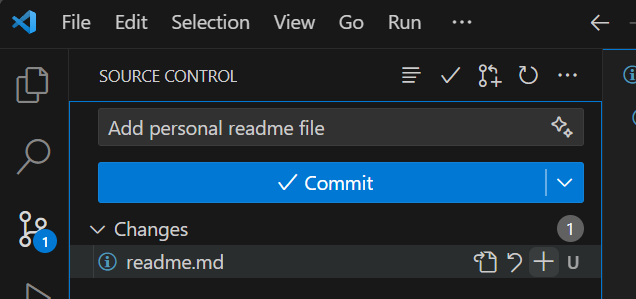
For this we will use the git integration in our IDE.
- Click on the icon with the blue dot.
- Hover over the readme file and with the + add it to the staging
- Write a commit message
- Commit
(Optional) Equivalent Terminal Command
git add readme.md
git commit -m "Add personal readme file"
Commit Message Recommendations
Writing clear and meaningful commit messages is crucial for effective collaboration and understanding the history of a project. Here are some recommendations for creating good commit messages:
Be Descriptive: Clearly describe the purpose of the commit. What changes are being made, and why? Use concise and descriptive language to convey the intention of the commit.
Start with a Verb: Begin your commit message with a verb in the imperative mood. This helps to create a command-like sentence that describes what the commit will do. For example, use "Add feature," "Fix bug," or "Update documentation." https://www.conventionalcommits.org/en/v1.0.0/
Use the Body for Details: If your commit requires more explanation, provide additional details in the body of the message. This can include why the change is necessary, any potential side effects, or relevant background information.
Reference Context: If your commit is related to a specific user story, issue or pull request, reference it in your commit message.
Separate Concerns: If your commit addresses multiple concerns (e.g., fixing a bug and adding a feature), consider making separate commits for each to keep the changes focused and easier to understand.
Review Before Committing: Take a moment to review your commit message before finalizing it. A well-crafted commit message can save time and frustration for both you and your collaborators.
Push to GitHub
If the branch does not yet exist on the server we can

(Optional) Equivalent Terminal Command
git push --set-upstream origin readme
After that for existing branches it will be a sync

(Optional) Equivalent Terminal Command
git push
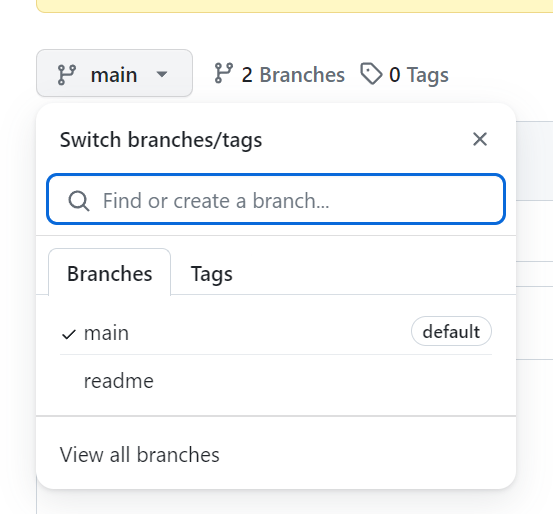
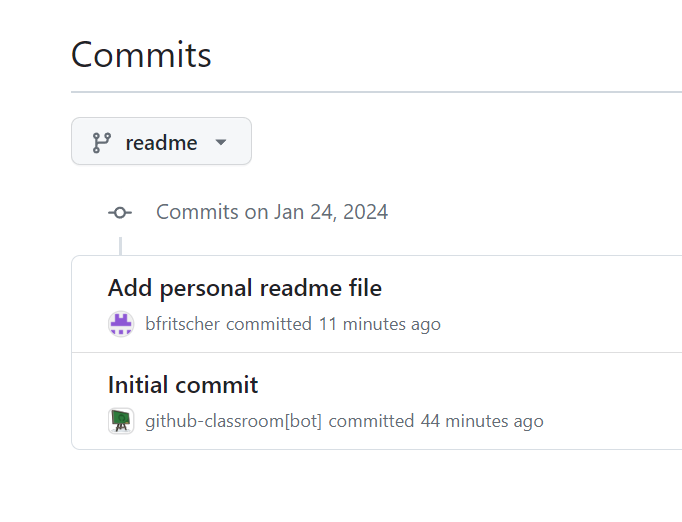
GitHub Branch
One GitHub refresh your page you should now see you published branch
And your commit when clicking 
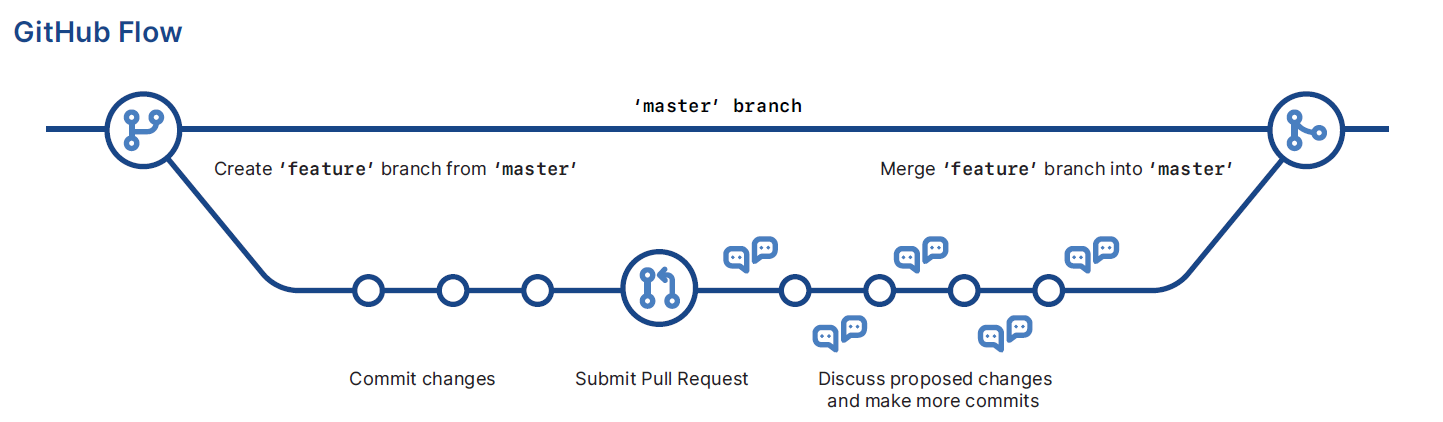
In Git, merging refers to combining changes from different branches into a single branch. It's a way of integrating the modifications made in one branch into another. The merge process automatically incorporates the changes, resolving any conflicting edits, and creates a new commit that represents the merged state. This is a fundamental operation in version control systems, allowing developers to consolidate their work and maintain a coherent codebase.
With GitHub we can use Pull Request to handle merges instead of doing it locally.
You should see

- Click Compare & pull request
- Create the pull request
- Merge the pull request

(Optional) Terminal Command
This is not equivalent to a pull request, but does create a merge locally.
git checkout main
git merge readme
git push
Getting the merge commit locally
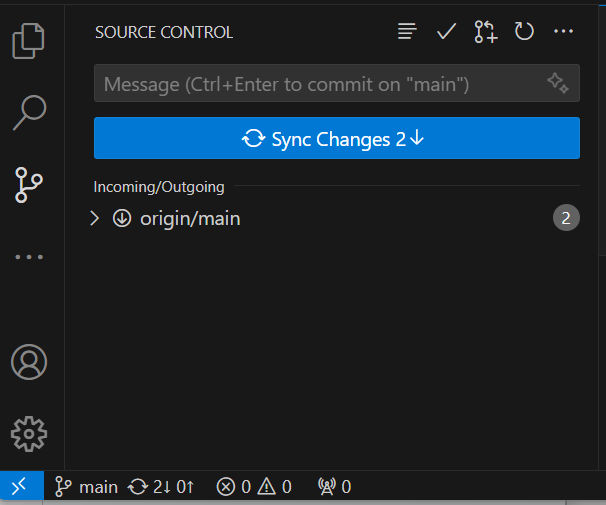
Whenever there are changes on GitHub either from a merge or a commit from another contributor, we need to sync these changes locally.
On your project folder
- Switch to the main branch
- Sync changes
This can be done on the git integration tab or by clicking on the bottom left of the editor
(Optional) Equivalent Terminal Command
git checkout main
git pull
Level1's index.html is already provided in your current project folder.